Set Up the Pulse for Salesforce App
Important: As of August 1, 2025, Pulse for Salesforce is no longer available for net-new sales. Pulse for Salesforce capabilities are available only if you previously purchased the app. Tableau Next(Link opens in a new window) gives your organization access to agentic analytics fully integrated with the Salesforce Platform, including many of the core capabilities of Pulse for Salesforce, like metric summaries.
The Pulse for Salesforce app integrates Tableau Pulse with your Salesforce data. With the app, your users can explore metrics about their data and get insights directly in Salesforce. For general information about Tableau Pulse metrics and insights, see About Tableau Pulse.
The app automates the process of connecting Tableau with Salesforce. To set up the app, you must complete steps in both your Salesforce org and on your Tableau site. After a connection is established between Salesforce and Tableau, the app prepares your data then creates metrics for sales, opportunities, and more. Users assigned to the correct permission set can access these metrics embedded in Salesforce.
Complete Tableau Cloud prerequisites
Set up your Tableau Cloud site
- Follow the instructions in the Tableau Cloud activation email to create a site.
- Copy your Site Name and URL, and paste them in a safe location. You’ll need these to set up the Pulse for Salesforce app.
Set the authentication type to Salesforce
- From the navigation panel on your Tableau site, select Settings.
- Select the Authentication tab.
- Under Authentication types, select Enable an additional authentication method.
- For Authentication, select Salesforce.
- Under Default authentication type for embedded views, select Salesforce.
You can use the Salesforce Authenticator app for multi-factor authentication. For more information, see Multi-Factor Authentication and Tableau Cloud.
Turn on Tableau Pulse and AI in Tableau
Make sure that the site settings for Tableau Pulse and AI in Tableau are turned on for your Tableau site.
- Turn on Tableau Pulse. See Deploy Tableau Pulse for your site.
- Turn on AI in Tableau. See AI in Tableau for Tableau Pulse.
Create a personal access token
- To turn on the personal access token setting for your Tableau site, go to site settings and follow the instructions on Site settings for personal access tokens.
- To create a token, go to your account settings and follow the instructions on Create a personal access token.
- Copy the Token Name and Secret, and paste them in a safe location. You’ll need these to set up the Pulse for Salesforce app.
Create a connected app
A connected app allows for seamless embedding of Tableau Pulse metrics in Salesforce. For more information about connected apps, see Configure Connected Apps with Direct Trust.
- From the navigation panel, select Settings.
- Select the Connected Apps tab.
- Select New Connected App > Direct Trust.
- For Connected app name, enter a descriptive name.
- For Access level, select All projects.
- For Domain allowlist, select All domains.
- Select Create.
- Select Generate New Secret.
- Copy the Secret ID, Secret Value (select the eye icon to reveal the value), and Client ID, and paste them in a safe location. You’ll need these to set up the Pulse for Salesforce app.
Install the app package in Salesforce
The Pulse for Salesforce app is a managed package that you install in your Salesforce org.
- While signed in to your Salesforce org as a Salesforce admin, open the Pulse for Salesforce package. The link to this package was sent to you when you purchased the Pulse for Salesforce app.
- Select Install for Admins Only.
- Select Install.
- On the Approve Third-Party Access dialog, select Yes, grant access to these third party web sites.
- Select Continue. The Pulse Installation Wizard is installed in your org.
Important: If the language setting for your Salesforce admin account is set to a language other than English, you must temporarily change your personal language setting to English to install the app. To learn how, see Change Language in Salesforce. After you set up the app, change the language setting back to your preferred language.
Complete Salesforce prerequisites
Assign users to the permission set
Tip: While you set up the app, consider limiting the permission set to a small number of users. After you’ve finished customizing the app, give access to the rest of your users, then re-sync the app. For more information, see Sync access to the Tableau Pulse app.
If you need to implement row-level security to protect your data, add only admins to the permission set during setup. Salesforce access control doesn't carry over to Tableau Cloud, so the users you add have access to all the data in the metrics until you implement additional security measures.
The Pulse app creates a permission set called “Pulse for Sales Cloud” in Salesforce. Assign the permission set to the users who should have access to the app. To learn how, see Manage Permission Set Assignments.
The users you add to this permission set have access to the Tableau Pulse app when you sync the app. At a minimum, add yourself to the permission set.
Add Tableau as a remote site URL
- Visit your Tableau site to identify the correct URL. Your URL should look like
https://us-west-2a.online.tableau.com/#/site/my-site/home. You’ll add the part of the URL that begins with https, and ends with .com, for example:https://us-west-2a.online.tableau.com - Navigate to your Salesforce Setup page.
- In the Quick Find box, enter
Remote Site Settings, and then select Remote Site Settings. For more information, see Configure Remote Site Settings. - For Remote Site Name, enter a descriptive name.
- For Remote Site URL, enter the URL that you identified in step 1.
- For Disable Protocol Security, don’t select the checkbox.
- For Active, leave the checkbox selected.
- Select Save.
Add Tableau as a trusted URL for redirects
- Navigate to your Salesforce Setup page.
- In the Quick Find box, enter
Trusted URLs for Redirects, and then select Trusted URLs for Redirects. For more information, see Manage Redirections to External URLs. - Select New.
- Enter the same URL that you added as a remote site.
- Select Save.
Set up the Pulse for Salesforce app
Before you set up the app, you must install the managed package for the app in your Salesforce org. If you haven't yet installed the package, see Install the app package in Salesforce.
Note: The Pulse installation wizard is available in the languages that Tableau supports. For the current list of languages, see Tech Specs for Tableau Cloud. For languages that are supported by Salesforce but aren't supported by Tableau, the wizard falls back to English.
- In the Salesforce App Launcher, search for the Pulse Installation Wizard and open it.
- Select Get Started.
- Enter your Tableau site information. If you don’t have this information, see Complete Tableau Cloud prerequisites.
- For Tableau Site Name, enter the name displayed after /site/ in your Tableau Cloud URL. For the example URL
https://us-west-2a.online.tableau.com/#/site/my-site/home, you would entermy-site. - For Tableau Site URL, enter the part of the URL that begins with https and ends with .com, for example:
https://us-west-2a.online.tableau.com - For Personal Access Token (PAT) Name, enter the name of the token that you saved when you created the PAT. See Create a personal access token.
- For Personal Access Token (PAT) Secret, enter the secret that you saved when you created the PAT.
- For Data Source Refresh Time, select the time each day when your data should refresh on Tableau Cloud. This time setting uses the time zone set on your Tableau site.
- For Select Cloud, choose the cloud that the Pulse app connects to for the metric data.
- For Tableau Site Name, enter the name displayed after /site/ in your Tableau Cloud URL. For the example URL
- Select Test Connection. The Pulse app validates the site information you added.
- For Sync Users, acknowledge the message about syncing users, then select Sync Users. The users in the “Pulse for Sales Cloud” permission set are added to your Tableau site.
- For Create Pulse Metrics, select Publish. The Pulse for Salesforce app creates the data sources, flow, and metrics based on your data.
- For Embed Your Pulse Metrics, enter the Client ID, Secret ID, and Secret Value that you noted when you created the connected app in Tableau. See Create a connected app.
- For Update Tableau Cloud Credentials, follow the instructions under Embed credentials for your data in Tableau. Then select Next.
- Select Finish.
Enable connected apps in Tableau
The Pulse for Salesforce app creates a connected app, in addition to the connected app that you created under the step Create a connected app. Enable these apps so that Tableau Pulse can be embedded in Salesforce.
- From the Tableau Cloud navigation panel, select Settings.
- Select the Connected Apps tab.
- For the app that you created, from the Actions (...) menu, select Enable.
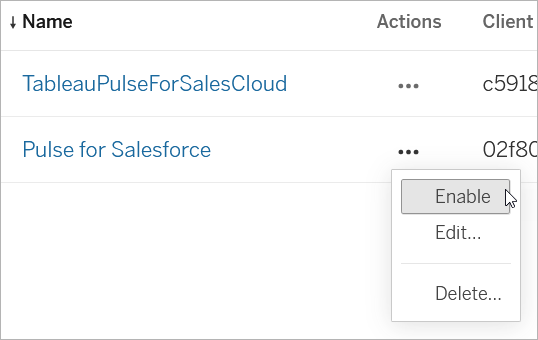
- Also enable the connected app called “TableauPulseForSalesCloud.” This is the app that the Pulse for Salesforce app created.
Embed credentials for your data in Tableau
The app automatically creates Tableau data sources and a flow to get your data ready for Tableau Pulse. Embed your credentials so that Tableau can connect to your data.
Embed credentials for the flow
- From the Tableau Cloud navigation panel, select Explore.
- In the content type menu, select All Flows.
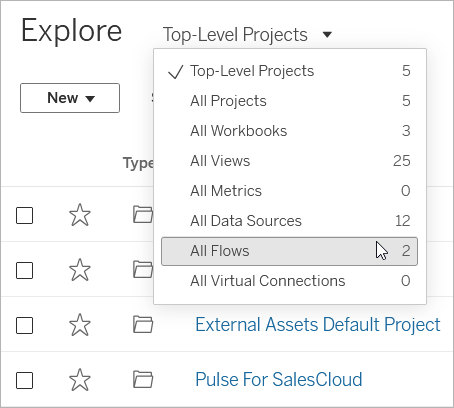
- From the Actions (...) menu for the flow called “Open Pipe,” select Edit Flow.
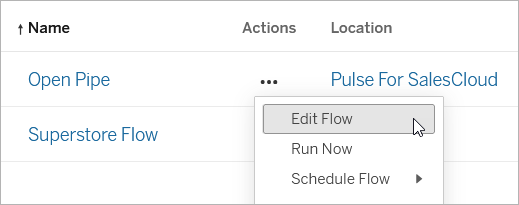
- Under Connections, select the Salesforce connection.
- Enter the credentials for the connection, then accept the prompt to allow access.
- Wait as Tableau connects to your org and resolves any errors in your flow. This should take less than a minute.
Edit and run the flow
Edit the final step of the flow so that the output goes to the correct location for the Pulse for Salesforce app. For more information about working with flows, see Build and Organize your Flow.
- Right click on the Output step for the flow, then select Remove.
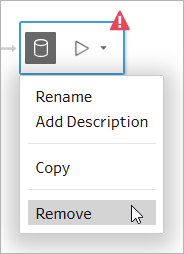
- Select the + after the final step, then select Output.
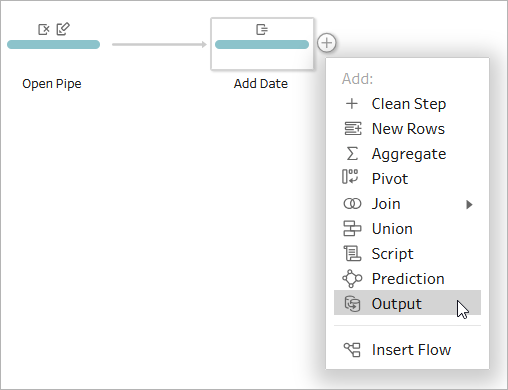
- For the Output step:
- For the Project, select Pulse for SalesCloud.
- For the Name, enter Open Pipe Datasource. The name of the output must be exactly that, or the metrics won’t get the data they need.
- Under Full Refresh, select Append to table.
- In the upper-right corner of the screen, select Publish.
- When asked to embed credentials for every connection, check the Embed credentials box.
- On the notification message, select View Flow.
- On the flow page, select Run All.
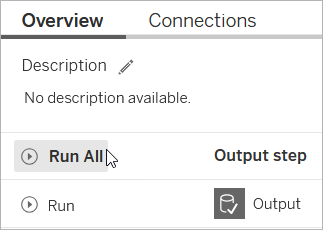
Embed credentials for the data source
- From the Tableau Cloud navigation panel, select Explore.
- In the content type menu, select All Data Sources.
- From the Actions (...) menu for the data source called “Sales Cloud Metrics Datasource,” select Edit Connection.
- Select Embed Salesforce credentials in the connection, then select your Salesforce account.
- Select Save.
Refresh the data source extract
- From the Actions (...) menu for the data source called “Sales Cloud Metrics Datasource,” select Refresh Extracts Now.
- Select Full Refresh.
Check the app in Salesforce
The Pulse for Salesforce app automatically creates a set of metrics based on your Salesforce data.
| Metric | Description |
|---|---|
| Average Days to Close - Won | Average time it takes to win an opportunity |
| Closed Opportunities (Running Total) | Number of opportunities that are closed |
| Conversion Rate | Share of the amount of opportunities won in relation to the amount of all closed opportunities (expressed as a percentage) |
| Created Opportunities (Running Total) | Total number of opportunities |
| Open Pipe (Daily) | Sum of opportunity amount for open opportunities for today |
| Open Pipe (Weekly) | Sum of opportunity amount for open opportunities for this week |
| Pipe Gen (Running Total) | Sum of opportunity amount for open opportunities (IsClosed = false) by time dimension of Created Date |
| Total Sales | Sum of opportunity amount for won opportunities by time dimension of Close Date |
| Win Rate | Share of the number of won opportunities in relation to the number of all closed opportunities (expressed as a percentage) |
- To make sure that the app is working as expected, in the Salesforce App Launcher, search for Pulse. Users who are assigned to the Pulse for Salesforce permission set can view this app in Salesforce.
- Open the Pulse app.
- Select a metric to open its insights exploration page.
- Make sure that your data appears as expected. The chart might be empty if it’s the first day of the time period displayed.
- If you initially limited the users who can access the Pulse app, after you’ve checked the metrics, add additional users to the permission set, then re-sync the app. For more information, see Control access.
Customize the metrics
You can customize the metrics that the Pulse for Salesforce app creates by editing the metric definitions that they’re based on, and you can create additional metrics by adjusting the filters. Edits must be made on your Tableau Cloud site. You can’t edit the metric definitions through the Pulse for Salesforce app.
Tip: If you want to create metrics from scratch using different data, see Create Metrics with Tableau Pulse.
Access metrics in Tableau Pulse
- From the Tableau Cloud navigation panel, select Tableau Pulse.
- Select Browse Metrics to see all metric definitions.
- Select a definition to see the metrics based on that definition.
Metric definitions contain the core metadata for metrics. Edits made to a metric definition affect all metrics that are based on that definition. For more information about the relationship between metric definitions and metrics, see Metric definitions and metrics.
Change the measure, time dimension, or definition filters
The measure and time dimension are the key components of a metric definition’s value, and definition filters are optional limits to that value. Edit the metric definition to change these fields. For more information about the key components of a metric definition, see Define the metric value.
Note that if you want to adjust the time range for a metric without changing the field used as the time dimension, you can simply filter an existing metric. For more information, see Create additional metrics.
- In Tableau Pulse, open the metric that you want to change.
- Select the actions (...) menu, then select Edit Definition.
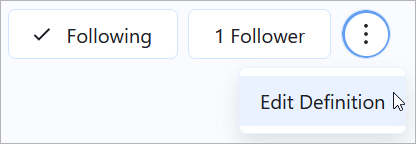
- For Measure, Time dimension, or Definition filters, select a different field from the data source. If you don’t see the field you want to add, see Include more fields from your Salesforce data.
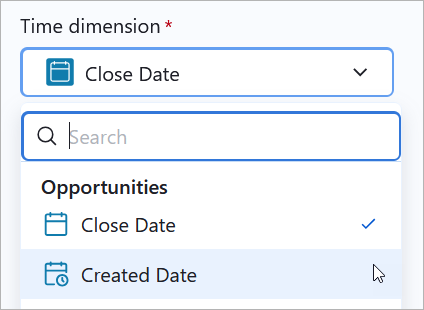
- Select Save Definition.
Tip: If you need to combine data from multiple fields, see Create an advanced definition. The advanced editor lets you create calculated fields. For more information about calculated fields, see Get Started with Calculations in Tableau.
Change metric names
The name shown on a metric is the name of its definition. You can change this name by editing the definition.
- In Tableau Pulse, open the metric that you want to rename.
- Select the actions (...) menu, then select Edit Definition.

- For Name, enter a new name.
- Select Save Definition.
Change insight dimensions
Insight dimensions are the fields that Tableau Pulse uses to generate insights about your data. The Pulse for Salesforce app automatically adds a set of insight dimensions to your metrics, and you can add more to look at other dimensions in your data. In addition to being used in insights, these dimensions are available as filters and in the question-and-answer experience on a metric’s insights exploration page.
- In Tableau Pulse, open the metric that you want to change.
- Select the actions (...) menu, then select Edit Definition.

- Under Adjustable metric filters, select Add Filter Option. The adjustable metric filters are used as insight dimensions.
- Select the fields that you want to add.
- Select Save Definition.
Change currency format
By default, metrics show currency in the format of US Dollars. Adjust the currency setting to change the number format and currency symbol.
- In Tableau Pulse, open the metric that you want to change.
- Select the actions (...) menu, then select Edit Definition.

- Under Number format, make sure that Currency is selected.
- Under Currency, select a currency code.
Include more fields from your Salesforce data
Each metric definition is connected to a data source, which is the link between your data and Tableau. The Pulse for Salesforce app automatically creates data sources based on your Salesforce data and uses these when creating metric definitions. If the field that you want to add as a measure or dimension isn’t available when you go to edit a metric definition, edit the data source or flow to add it. After you edit the data source or flow, edit the relevant metric definitions and replace the pre-existing fields with the newly added fields.
The data source called “Sales Cloud Metrics Datasource” supplies the data for the following metrics:
- Average Days to Close - Won
- Closed Opportunities (Running Total)
- Conversion Rate
- Created Opportunities (Running Total)
- Pipe Gen (Running Total)
- Total Sales
- Win Rate
The flow called “Open Pipe” and the data source called “Open Pipe Data source” provide the data for the following metrics:
- Open Pipe (Daily)
- Open Pipe (Weekly)
The Pulse for Salesforce app brings in data from the User, Account, and Opportunity Salesforce objects. If you need data from different objects, make sure that they include equivalents for the fields in the following table.
| Salesforce object | Fields |
|---|---|
| User | Id, Name |
| Account | Id, Name, BillingState, BillingCountry, Industry |
| Opportunity | Id, AccountId, Amount, OwnerId, CreatedById |
Tip: If you need entirely different data from what is included in the prebuilt data source, use the Salesforce connector to create a new published data source. For more information about connecting to Salesforce data, see Salesforce CRM.
If your organization uses a platform like Snowflake to store your data, connect directly to that data platform. For more information, see Use Supported Connectors. Then create new metric definitions and metrics using that data instead.
Edit the Tableau data source to add a new Salesforce data object
If the data that you want to add is in an object that hasn’t yet been added to the data source, add it to the data canvas.
- From the Tableau Cloud navigation panel, select Explore.
- In the content type menu, select All Data Sources.
- Open the data source called “Sales Cloud Metrics Datasource.”
- Select Edit Data Source. For more information about editing a data source, see Edit a Published Data Source.
- Drag the data that you want to add onto the canvas.
- Relate or join the new object to the existing data. See Relate Your Data and Join Your Data.
- Select Publish.
Now, if you edit the metric definition, the added data appears when you go to select a field.
Edit the flow to change the filtered data
Metrics require a time dimension. For point in time data, it’s necessary to use a flow to snapshot the data and create the time series. If you edit the flow to use different fields, the snapshot of that data starts when you first run the updated flow. For more information about flows, see Build and Organize your Flow.
- From the navigation panel, select Explore.
- In the content type menu, select All Flows.
- Open the flow called “Open Pipe.”
- Adjust the fields filtered by the flow. For more information, see Filter Your Data.
- Select Publish.
- On the notification message, select View Flow.
- On the flow page, select Run All.
Create additional metrics
From a single metric definition, you can create as many metrics as there are combinations of filter options for that definition. Consider creating metrics that are specific to a particular role and adding only the relevant users or groups as followers. To learn how, see Create metrics.
You can create metrics only from fields that are included in the metric definition. To use different fields, either edit the metric definition or create a new definition.
Add followers
You can add individual users or user groups as followers to metrics. To learn how to add followers on Tableau Cloud, see Manage followers. You can also add followers using the REST API with the Batch create subscriptions method.
Followers receive an email digest that shows how their metrics are doing. If they follow two or more metrics, they also see an insights summary highlighting notable changes to the data.
Users who are following metrics as part of a group can’t individually unfollow those metrics. These users can, however, choose not to receive a digest of the metrics they follow. For more information, see Help users manage digests.
Manage user groups
The Pulse for Salesforce app creates a Tableau user group called “Pulse for Sales Cloud.” This group contains all the users that were part of the Salesforce permission set that you synced while setting up the app.
You can create a new group and add specific users to it. To learn how, see Create a Group and Add Users to It. You can also change the users in an existing group. To learn how, see Add users to a group (Groups page). Groups are useful for adding users with the same job role as followers to metrics. Groups can also be used to limit access to the data in metrics. For more information, see Control access.
Help users manage digests
As a Tableau administrator, you can’t change the digest settings for users. Users can individually opt out of receiving digests for the metrics they follow.
- Open the Pulse app in Salesforce.
- On a metric page, select the avatar icon at the upper-right corner, then select Preferences.

- Choose whether to receive digests.
- Choose how frequently to receive digests.
- Select Save.
Control access
Access controls to the data that have been configured in Salesforce don’t carry over into Tableau Cloud. Unless you limit access to the data in Tableau Cloud, you should consider the data in the Pulse for Salesforce app accessible by all users.
Sync access to the Tableau Pulse app
The users who you add to the Pulse for Salesforce permission set can access the app in Salesforce. Add or remove users from this permission set to limit access to the app. To learn how, see Manage Permission Set Assignments.
After you update the permissions set, open the wizard to re-sync the users with Tableau.
- In the Salesforce App Launcher, search for the Pulse Installation Wizard and open it.
- Select the Sync New Users tab.
- Enter the same site information that you entered when setting up the app. See Set up the Pulse for Salesforce app.
- Select Test Connection.
- Acknowledge the message about syncing users, then select Sync Users. The users in the “Pulse for Sales Cloud” permission set are synced with the “Pulse for Sales Cloud” user group in Tableau.
Limit access to individual metrics
You can edit a metric definition to limit access to the data to a specific Tableau group. Before you edit the definition, create the user group that you plan to use to limit access. To learn how, see Create a Group and Add Users to It.
- In Tableau Pulse, select the metric you want to limit access to.
- Select the actions (...) menu, then select Edit Definition. Note the measure, aggregation, time dimension, and any definition filters.
- Select Create Advanced Definition.
- Drag the fields that you noted in step 2 to the Measure, Time Dimension, and Filters shelves.
- On the measure name, select the arrow, then select the aggregation type.

- Next to the field search box, select the arrow, then select Create Calculated Field.
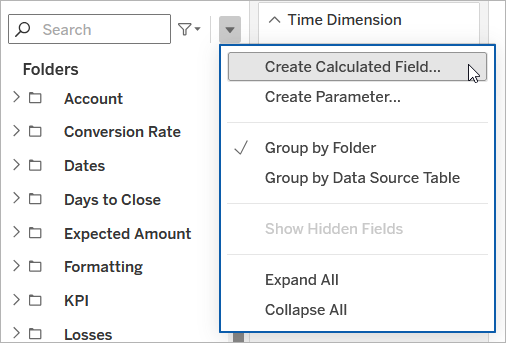
- In the calculation editor, enter the calculation that includes the group that you want to limit access to, replacing
GroupNamewith your group’s name.ISMEMBEROF('GroupName') - Drag the calculated field to the Filters shelf.
- For the filter, under List, select Custom value list.
- Enter True, then select Add.
- Uncheck Include all values when empty.
- Select OK to apply the filter.
- On the Advanced Analytics Editor, select Apply.
- Select Save Definition.
Implement row-level security
If you want your users to see data that's specific to them, for example, based on the organization they belong to or the region they sell in, you must implement row-level security for the data. There are a number of ways to implement row-level security for Tableau Cloud, depending on your goals and your data. For more information, see Overview of Row-Level Security Options in Tableau and Best Practices for Row Level Security with Entitlements Tables.
