Turn On AI in Your Tableau Cloud Site
As of 14 October 2025, Data Cloud has been rebranded to Data 360. During this transition, you may see references to Data Cloud in our application and documentation. While the name is new, the functionality and content remains unchanged.
AI in Tableau brings trusted Einstein generative AI capabilities to the entire Tableau platform. AI in Tableau can enhance your data analysis by suggesting steps to help you clean your data in Tableau Prep flows, creating calculations for Tableau Prep flows or when building a viz, recommending insightful questions to explore your data, summarising key metrics and creating compelling visualisations directly from your data sets.
AI in Tableau is powered by Einstein AI and inherits the Einstein Trust Layer(Link opens in a new window) and security controls. To learn more about AI in Tableau, see AI in Tableau(Link opens in a new window). For general information about Einstein Generative AI, see About Einstein Generative AI(Link opens in a new window) in the Salesforce help.
This topic includes procedures for three different scenarios and walks you through the steps necessary to configure AI for use in Tableau Cloud in each of those scenarios. The steps you follow depend on what you are trying to do:
Trial customers: If you are trying AI in Tableau with a trial, go to the instruction later in this topic: Trial Users.
Tableau Pulse customers: Tableau Cloud administrators can turn on insight summaries and better semantic matching for Ask Q&A in Tableau Pulse. For details, see AI in Tableau for Tableau Pulse(Link opens in a new window).
Tableau+ customers: Tableau+ customers can configure Enhanced Q&A (Discover), as well as other generative AI and Tableau Agent features. These features require additional configuration steps in Salesforce and are described in Configure Tableau Cloud sites for AI.
Starting in version 2025.1.0, Tableau Desktop users who are signed in to a Tableau Cloud site with Tableau+ and with AI enabled will be able to access Tableau Agent. For more details, see Build Views and Explore Data with Tableau Agent(Link opens in a new window) in the Tableau Desktop and Web Authoring Help.
Starting in version 2025.2, Tableau Prep users who are signed in to a Tableau Cloud site with Tableau+ and with AI enabled will be able to access Tableau Agent in Tableau Prep Builder and in Tableau Cloud for Tableau Prep web authoring to help clean and transform your data. For more details about this feature, see Build Tableau Prep flows with Tableau Agent(Link opens in a new window) in the Tableau Prep help.
Starting in version 2025.3, you can also use Tableau Agent when you connect to Tableau Server. For more information about using Tableau Agent with Tableau Server, see Turn on AI in Your Tableau Server Site(Link opens in a new window).
Prerequisites for Enabling AI in Tableau Cloud
Tableau Cloud customers have a few options for configuring generative AI in their sites. The necessary steps depend on what features you have access to and want to use.
Tableau Pulse features such as insight summaries and better semantic matching for Ask Q&A need to be turned on in Tableau Cloud site settings, but don't require you to log in to a Salesforce org.
Enhanced Q&A (Discover) in Tableau Pulse must be turned on in Tableau Cloud site settings and also requires a connection to a Salesforce org. For more information, see Configure Tableau Cloud sites for AI and AI in Tableau for Tableau Pulse(Link opens in a new window).
To use generative AI with other features such as Tableau Cloud web authoring, Tableau Prep and Tableau Catalogue, you must have Tableau+, and configuration is necessary in both Tableau and in Salesforce. For instructions, see Configure Tableau Cloud sites for AI. To turn on AI in Tableau for these features, you'll need the following:
A Tableau Cloud site with Tableau+. For more information about Tableau+, see About Tableau+(Link opens in a new window)
A Salesforce org that has Einstein generative AI set up. When you purchase Tableau+, a Salesforce org is provisioned for you if you don't already have one, but you'll need to configure it for Einstein generative AI. The instructions below walk you through this.
A Data Cloud instance. When you purchase Tableau+ a Data Cloud instance is provided if you do not already have one.
The proper permissions and credentials for Tableau and Salesforce. These are explained below.
For complete instructions go to Configure Tableau Cloud sites for AI below.
Permissions and credentials for Tableau and Salesforce.
To connect your Salesforce Org to your Tableau Site, you'll need user credentials with the following roles and permissions:
Tableau: Tableau Cloud Site Administrator (Explorer or Creator) role. For more information about setting this site role and its permissions, see Set Users' Site Roles(Link opens in a new window).
Salesforce: Customise Application Profile permission. For more information about this permission, see User capabilities with 'Customise Application' Profile permission(Link opens in a new window) in the Salesforce help.
Note: When the Salesforce Org is provisioned for Tableau+ customers, the admin user that is created should already have the Customise Application permission assigned. For more information about this permission, see Custom Permissions(Link opens in a new window) and Grant Permissions on Custom Settings(Link opens in a new window) in the Salesforce help.
Configure Tableau Cloud sites for AI
To take full advantage of generative AI in Tableau, you must make configuration changes in both Salesforce and your Tableau Cloud site. This is a multi-step process and the following procedures describe how to do this. These options are available to Tableau+ customers.
Briefly, the configuration includes two main parts, setting up Einstein generative AI in Salesforce, and then setting it up in your Tableau Cloud site.
Note: If you have an existing instance of Salesforce with Tableau+, you’ll need to work with your Salesforce Admin to ensure proper configuration of the Salesforce org. After the Salesforce admin has completed configuration of the Salesforce org, they can provide a set of credentials for a Salesforce user with the required permissions to the Tableau admin. The Tableau admin can then use those credentials to enable the connection for AI in Tableau and that Salesforce org.
Here is an outline of these steps, followed by detailed instructions:
Set up Einstein generative AI in Salesforce:
Step 1: Activate your Salesforce Org.
Set up Einstein generative AI in Salesforce
To set up Einstein generative AI for your Salesforce org, complete the following steps.
Step 1: Activate your Salesforce Org
After your purchase is completed, Salesforce will email an invitation to activate your new Salesforce Org if you do not already have one. Your activation will provision your Salesforce Org and finalise the creation of your Salesforce Org User.
Note: If you provided an existing Salesforce Org to use during the quoting process, work with your Salesforce Admin to turn on Data Cloud and Einstein generative AI.
Step 2: Set up a Data Cloud Architect User
To turn on Data Cloud, you need to have the Data Cloud Architect permission set. If you don't see Data Cloud Setup in your setup menu, complete the steps in this section. Otherwise, proceed to the next section to turn on Data Cloud.
For more information about Data Cloud permission sets, see Data Cloud Standard Permissions Sets(Link opens in a new window) in the Salesforce help.
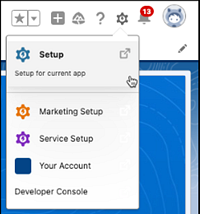
Add the Data Cloud Architect permission set to a user
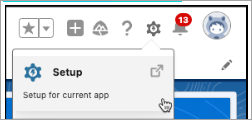
In the top-right corner, select the Setup
 icon.
icon.Select Setup from the drop-down menu.
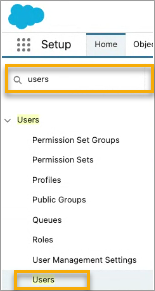
In the Quick Find box, type Users, then select Users from the results.
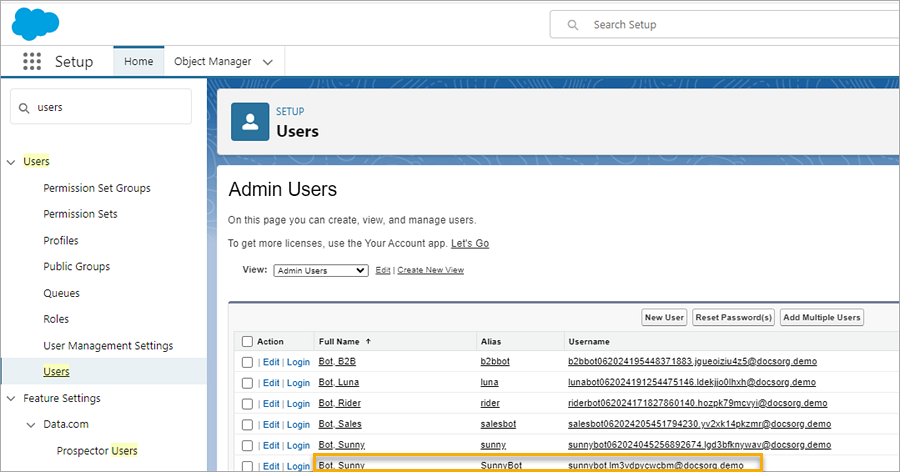
On the Users page, select the user who should have Data Cloud permissions. Click on User name, Alias or Username to open and edit the user profile.
To view the permission sets assigned to the user, on the User profile page, hover over Permission Set assignments, then select Edit Assignments. If the user is already assigned the Data Cloud Architect or Data Cloud Marketing Admin permission set, it would be shown in the first 5 permission sets.

In the Permission Sets page, select the Data Cloud Architect permission in the Available Permission Sets, then select the Add arrow to add it to the Enabled Permissions Sets. Then select Save.
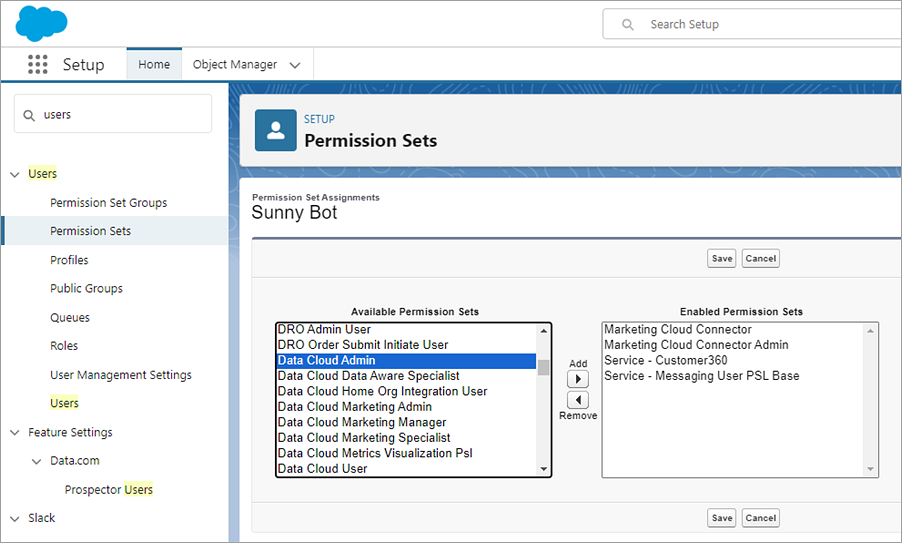
You should now see Data Cloud Setup in the Setup menu.
Step 3: Turn on Data Cloud
Enable Data Cloud in your provisioned Salesforce org. Users must have the Data Cloud Architect permission set assigned to enable Data Cloud. For more information about setting up Data Cloud in Salesforce, see Set Up and Maintain(Link opens in a new window) in the Salesforce help.
Log in to your Salesforce org in Salesforce.
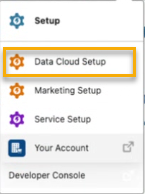
In the top-right corner, select the Setup
 icon.
icon.Select Data Cloud Setup from the drop-down menu. If you don’t see this option, your users might not have Data Cloud permissions set up. If this is the case, follow the steps in Step 2: Set up a Data Cloud Architect User.

On the Data Cloud Setup page, in the bottom left-hand corner, select Get Started to begin provisioning your org’s Data Cloud. This may take a few minutes.
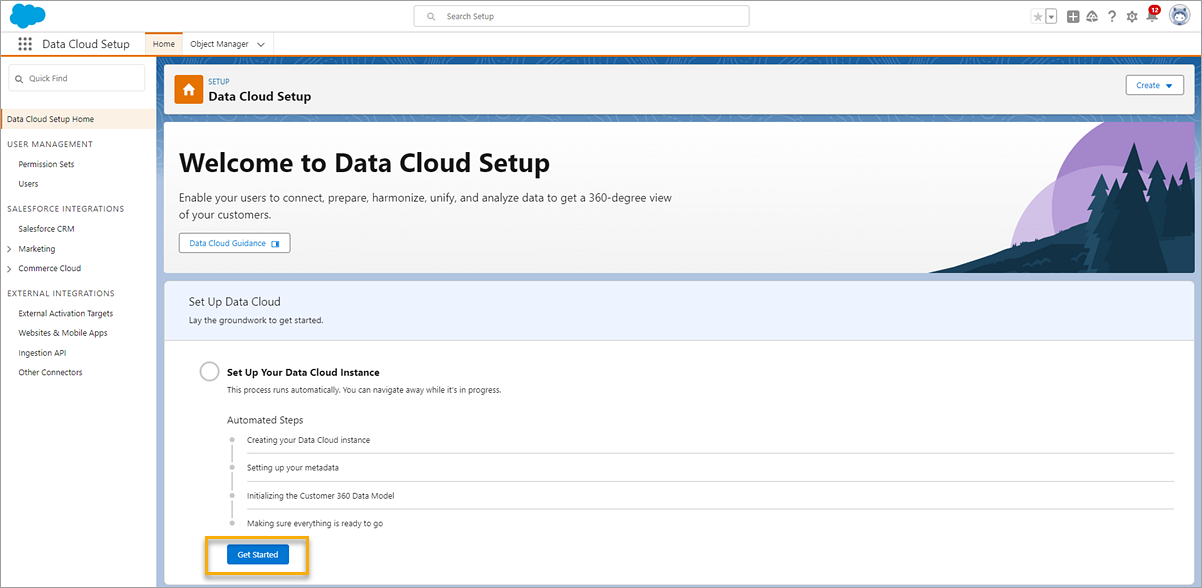
The process runs automatically. Once complete, your page will look similar to the page below.
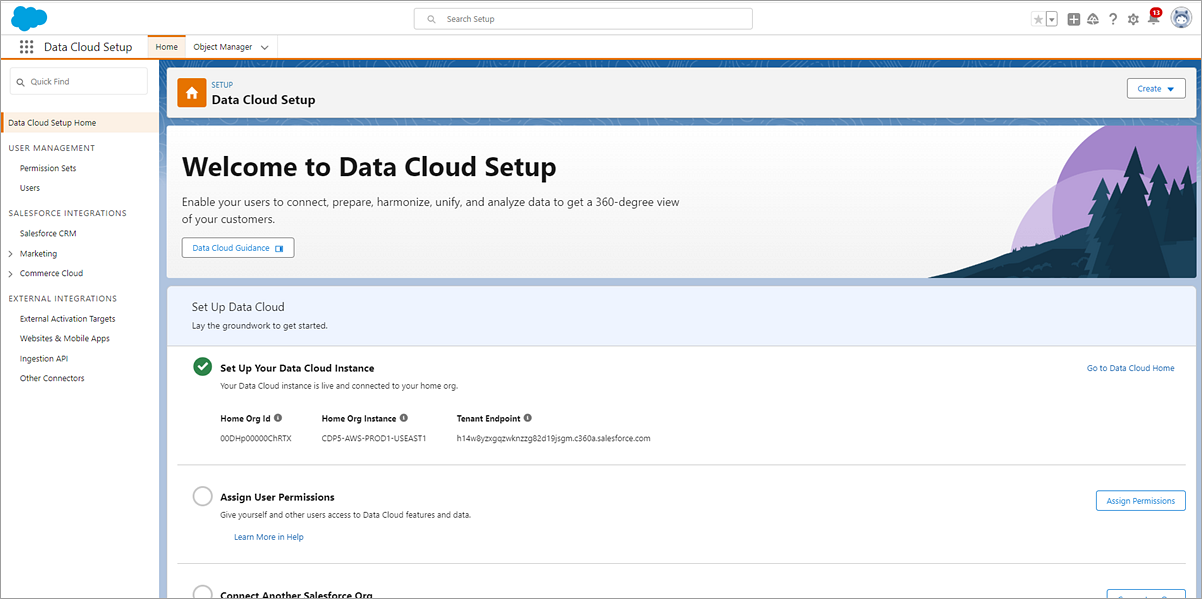
Step 4: Configure your Salesforce org
Set up your Salesforce org to turn on Einstein generative AI. Data Cloud setup must be complete before you can turn on the Einstein Trust Layer, set up data masking and turn on Einstein generative AI data collection and storage.
You'll need to do the following:
Turn on Einstein Generative AI to sync Einstein and Data Cloud and use generative AI features.
Set up Einstein Trust and set up data masking for Personally Identifying Information (PII).
(optional) Turn on Einstein data collection and storage to store your Einstein generative AI audit and feedback data in Data Cloud.
For more information, see Set Up Einstein Generative AI(Link opens in a new window) in the Salesforce help.
Turn on Einstein
In your Salesforce Org, if you aren't already on the Setup pages, select the Setup
 icon in the top-right corner of the page. Then select Setup from the drop-down menu.
In the Setup Quick Find box, type Einstein Setup, then select Einstein Setup from the results.
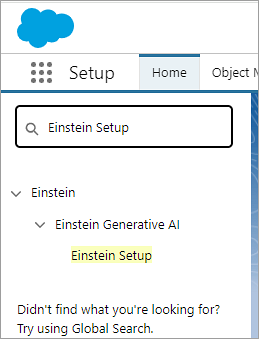
Enable Turn on Einstein.

Set up the Einstein Trust Layer
The Einstein Trust Layer identifies and masks sensitive information in the prompts before sending them to the large language model (LLM). The Einstein Trust Layer uses data masking to protect sensitive data such as personally identifiable information (PII) from being exposed to external LLMs. Complete this step to build trust in your generative AI and personalise data privacy controls that are integrated into the end-user experience.
Note: Data Cloud setup must be complete before you can turn on the Einstein Trust Layer and configure data masking.
In the Einstein Setup page, select Go to Einstein Trust Layer.
In the Einstein Trust Layer page, turn on Large Language Model Data Masking and set the PII masking options for your organisation.
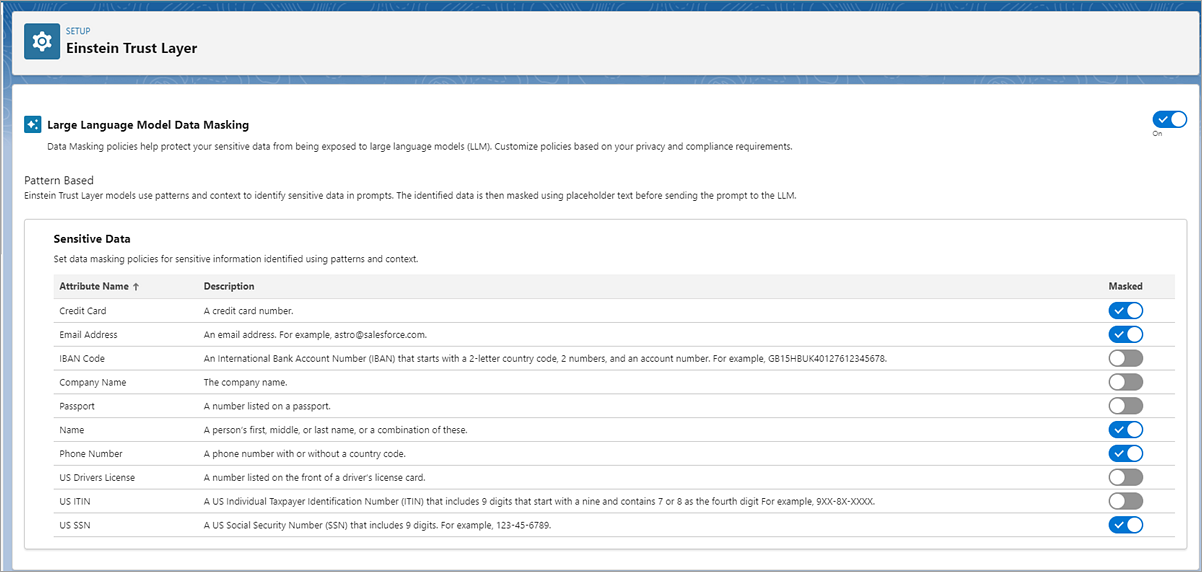
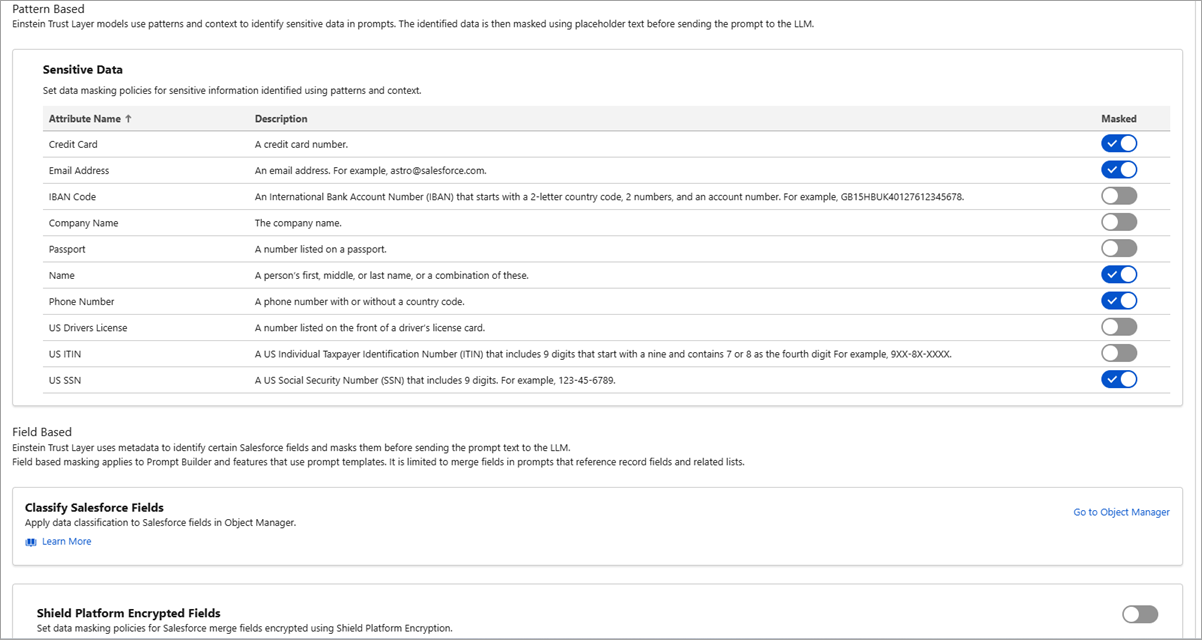
Turn on Einstein Generative AI data collection and storage
Track the use of generative AI in your Salesforce org and ensure that AI usage complies with your security, privacy, regulatory and AI governance policies. This feature may consume Data Cloud credits. For more information see AI in Tableau Usage(Link opens in a new window).
Note: Data Cloud setup must be complete before you can turn on Einstein generative AI data collection and storage.
In the Setup Quick Find box, type Einstein Audit, then select Einstein Audit, Analytics and Monitoring Setup from the results.
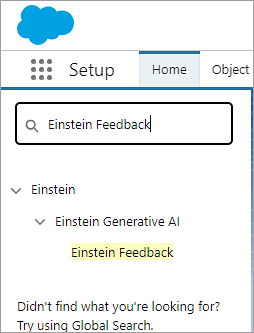
In the Einstein Audit, Analytics and Monitoring Setup page, turn on Audit and Feedback. It can take a few hours before Einstein Generative AI audit data is available in Data Cloud.

Configure AI in Tableau
Turn on the generative AI functionality for specific features in Tableau Cloud by following the procedures below. For some features, you can choose to turn it on for a single group of users or for all users on your site. For more information, see Turn on AI in Tableau for users in a group.
Note: This feature uses generative AI, which is built on the Einstein Trust Layer. Your data stays safe and secure through data and privacy controls that are seamlessly integrated into the user experience. For more information, see Einstein Trust Layer(Link opens in a new window).
Sign in to Tableau Cloud as a site administrator.
On the site where you want to turn on generative AI features, select Settings.
(Optional) Under AI in Tableau, select the Actions
 menu, then select Turn On to turn on insight summaries and better semantic matching. These capabilities don't require a Salesforce org.
Log in to your Salesforce org.
Select Connect to Salesforce.
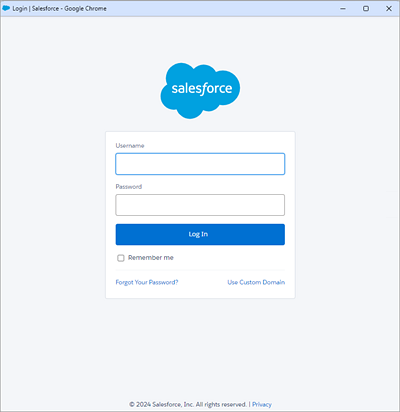
On the Login | Salesforce page, enter the Salesforce user credentials for the Salesforce org.
The Salesforce user ID must be assigned the Customise Application Profile permission. For more information, see User capabilities with 'Customise Application' Profile permission(Link opens in a new window) in the Salesforce help.
Your Salesforce org must have Einstein generative AI turned on.
On the Allow Access page, select Allow.
After successfully connecting to your Salesforce org, you can also edit, test or delete your connection as needed.
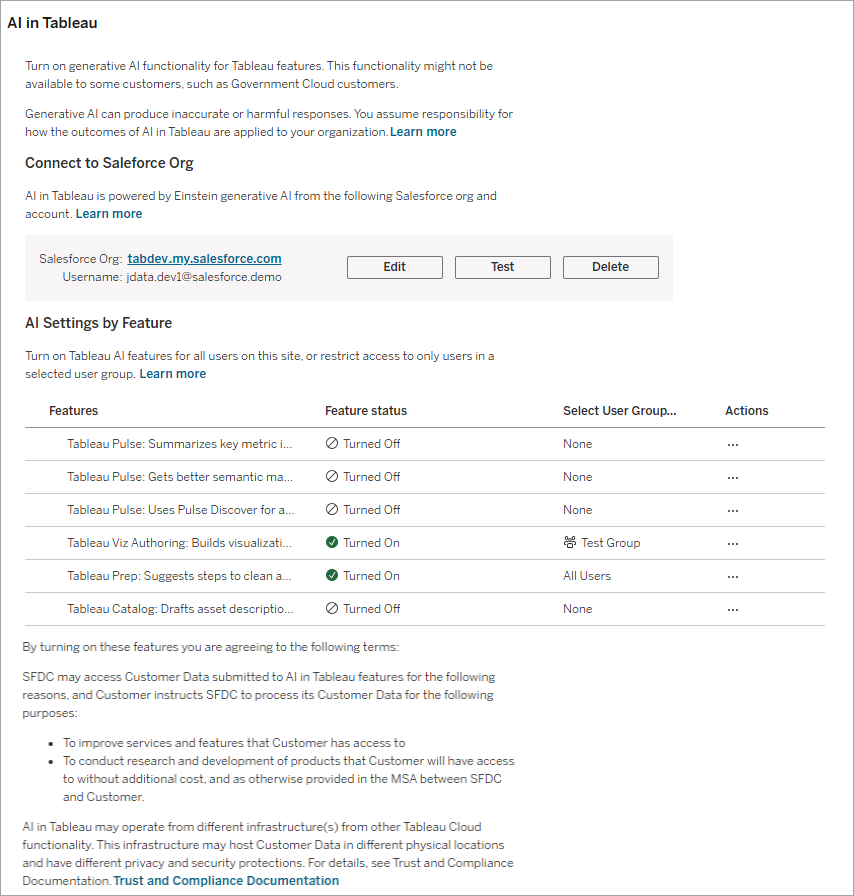
For each AI in Tableau feature that you want to turn on, select the Actions
 menu, then select Turn On. Select from the following features:
Tableau Pulse: Uses Pulse Discover for an in-depth, integrated exploration of groups of metrics and insights: Enable users to explore groups of metrics using Enhanced Q&A (Discover). Discover uses statistical algorithms to examine grouped metrics and surface insights that are relevant, interesting and worth investigating. For more information about this feature, see Turn on enhanced Q&A (Discover) in Tableau(Link opens in a new window).
Tableau Viz Authoring: Builds visualisations or completes tasks for you using a conversational UI: Enable users to create visualisations and create and understand calculations with the assistance of Tableau Agent in Tableau Cloud web authoring and in Tableau Desktop (version 2025.1 and later). For more information about Tableau Agent, see Explore Your Data with Tableau Agent(Link opens in a new window).
Tableau Prep: Suggests steps to clean and transform your data: Enable users to clean their data, create calculated fields and build flows with the help of Tableau Agent. This feature is available in Tableau Prep web authoring in Tableau Cloud and in Tableau Prep Builder (version 2025.2 and later). For more information about Tableau Agent in Tableau Prep, see Build Tableau Prep flows with Tableau Agent(Link opens in a new window).
Tableau Catalog: Drafts asset descriptions enable users to automatically generate descriptions for data sources, workbooks, and tables. For more information about generative AI in Tableau Catalog, see Manage Web Content(Link opens in a new window).
Turn on AI in Tableau for users in a group
You can turn on AI in Tableau features for either a single user group or for all users on your site. Currently this option is only available for AI in Tableau for Viz Authoring and Tableau Prep features. To learn how to create a user group for these AI in Tableau features, see Create a Group and Add Users to It(Link opens in a new window).
Under AI in Tableau, select the Actions
 menu for the feature where you want to set group access.
If the feature isn’t turned on, select Turn On.
Select the Actions
 menu again, then select Select User Group.
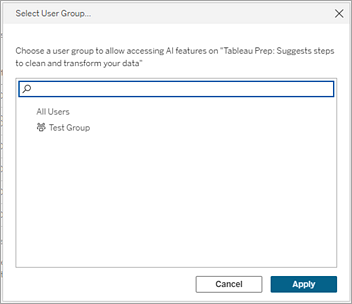
In the Select User Group dialog, select a single user group, then click Apply. Only users in this user group will be able to access Tableau Agent for the selected feature area. All other users might be able to click the Tableau Agent icon, but will get a permissions error.
Click Save at the top of the page to save your Site Settings.
Trial Users
If you'd like to try AI in Tableau, you can sign up for a Tableau Cloud free trial. This includes Tableau Pulse insight summaries and enhanced Q&A (Discover), and the Tableau Agent features in web authoring, Tableau Desktop (version 2025.1 and later) and Tableau Prep Builder (version 2025.2 and later).
Simply fill in this form or contact your Account Executive to get started. Once you sign up, you will receive access to a new Tableau Cloud site. You can't add a trial of Tableau Agent to an existing site.
As a trial user, most of the configuration is taken care of for you and you can turn on AI features for Tableau Cloud Web Authoring and Tableau Prep. While requests are free with the trial, limits may apply to the number of requests you can make per hour. The following options are not available when using the trial experience:
Tableau Agent in Tableau Catalog
Customised data masking
Audit trail in Data Cloud
To start using AI in Tableau, complete the following steps:
Sign in to your trial Tableau Cloud Site as a site administrator.
Select Settings.
In the AI in Tableau section, AI Settings by Feature, select the Actions
 menu, then select Turn On.
Note: For some features, you can choose to turn it on for a single group of users or for all users on your site. For more information, see Turn on AI in Tableau for users in a group.
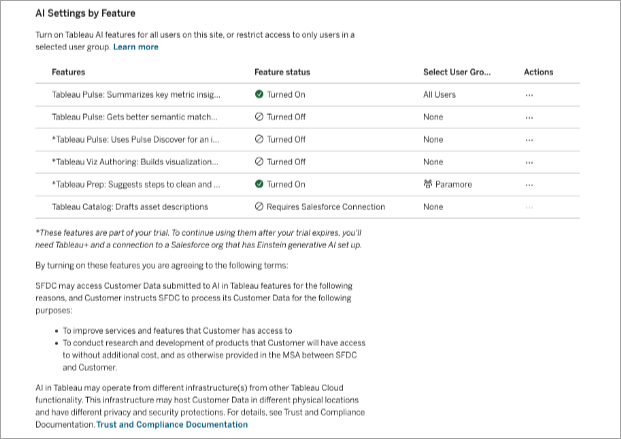
Select from the following features:
Tableau Pulse: Summarises key metric insights: Enable users to see their personalised insights summaries and get a quick overview of important changes to their metrics. For more information about generative AI in Tableau Pulse, see AI in Tableau for Tableau Pulse(Link opens in a new window).
Tableau Pulse: Gets better semantic matches on insights in any language when asking questions.: Enable users to get the best semantic results when using Ask Q&A to explore a single metric, in any language. For more information about this feature, see Turn on better semantic matches for Ask Q&A in Tableau(Link opens in a new window).
Tableau Pulse: Uses Pulse Discover for an in-depth, integrated exploration of groups of metrics and insights: Enable users to explore groups of metrics using Enhanced Q&A (Discover) and surface insights that are relevant, interesting and worth investigating. For more information about this feature, see Turn on enhanced Q&A (Discover) in Tableau(Link opens in a new window).
Tableau Viz Authoring: Builds visualisations or completes tasks for you using a conversational UI: Enable users to create visualisations and create and understand calculations with the assistance of Tableau Agent. For more information about Tableau Agent in Tableau Cloud web authoring, see Explore Your Data with Tableau Agent(Link opens in a new window).
Tableau Prep: Suggests steps to clean and transform your data: Enables users to use Tableau Agent to help them clean their data, create calculated fields and build flows. This feature is available in Tableau Prep web authoring in Tableau Cloud and in Tableau Prep Builder (version 2025.2 and later). For more information about Tableau Agent in Tableau Prep, see Build Tableau Prep flows with Tableau Agent(Link opens in a new window).
Navigate to a Tableau Prep flow or Tableau workbook and select the Tableau Agent
 icon to open the Tableau Agent pane and type a request. In Tableau Prep Builder, users must be signed in to the Cloud site with AI in Tableau turned on to see the icon.
Important: To use AI in Tableau in your production site after your trial expires, you'll need to purchase Tableau+, connect to a Salesforce org that has Einstein generative AI set up and complete the configuration steps described above in this topic.
