Migration Plan Overview
Tableau Content Migration Tool creates a streamlined process for migrating Tableau content between sites and projects. The easy-to-follow plan can be audited, is repeatable, and works via a batch process so any number of workbooks and data sources can be migrated in a simple and efficient process.
The Content Migration Tool will display contextual tips to walk you through creating or editing a migration plan. Once you select the source and destination sites, a summary of your migration will be displayed at the top of the screen as follows:

Limitations when migrating content
Before you start, make sure you understand the limitations when migrating content using the Content Migration Tool. For more information, see Migration Limitations.
Encryption keys
Each migration plan file is generated with an encryption key unique to the application that created the plan. Encryption keys can be shared if the migration plan needs to be run through an application that did not originally generate the file. When sharing encryption keys, you will need to overwrite the existing key in the application to run the migration plan. To view your encryption key, select Help > Settings.
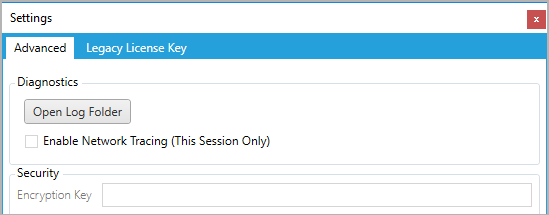
If you will be using the Content Migration Tool Console Runner for migration plans, you must specify the encryption key using the tabcmt-runner encryption command before running the plan. For more information, see Using the Tableau Content Migration Tool Console Runner.
Migration process
Step 1: Start
The core of the migration process is creating a plan, which you can save and re-use for future migrations or modify and update as needed. The first step is choosing whether to create a new plan, or select a previously saved plan.
To create a new plan, click Create New Plan. If you already created a migration plan and want to use it, click Browse for a Plan.

By default, all of your saved migration plans will be stored in the Tableau Content Migration Tool Plans folder in your My Documents folder. All migration plans are saved with a .tcmx extension, with recently accessed plans listed separately to make them easy to select:

You can select a recently accessed plan and duplicate it to modify the plan and save it as a new plan. Select the plan you want to copy and click Duplicate.
![]()
Step 2: Planning
The Content Migration Tool guides you through building or editing your migration plan in six steps.
Click on each step for detailed instructions:
- Migration Plans: Sites
- Migration Plans: Source Projects
- Migration Plans: Workbooks
- Migration Plans: Published Data Sources
- Migration Plans: Permissions and Ownership
- Migration Plans: Migration Scripts
- Migration Plans: Plan Options
Step 3: Migration
Once you have completed your plan, you are now ready to run the batch process for migration. When you reach the final step of the migration, a plan summary displays for your verification:
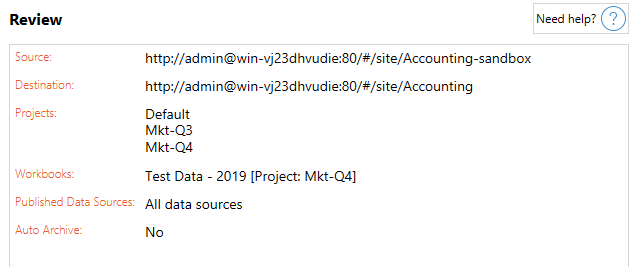
If you want to change any aspects of your plan, you can click on a section in the left sidebar to go directly to that phase. When you are ready, click Run to begin your migration.
When you click Run, the migration tool will prompt you about any unsaved elements of your plan. By default, any unsaved elements will be saved when you click Yes. Remember you can always keep your previous plan without making any changes by duplicating it during the Start phase of the migration process.

Your migration plan will run and a status bar displays for the overall plan progress and each workbook being sent to the destination server.

When the plan finishes running, you can click the tabs at the bottom of the screen for more information about the migration.
Published workbooks
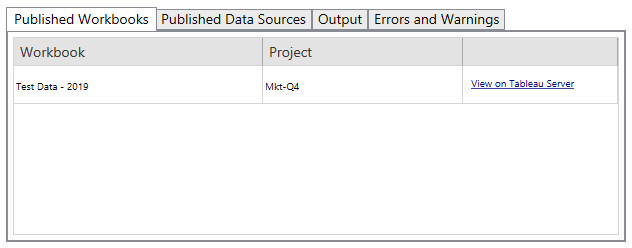
Published Workbooks details the newly published workbooks and the projects where they were migrated.
Published data sources
Published Data Sources details the newly published data sources and the projects where they were migrated.
Output
The Output tab details the migration log of your plan.
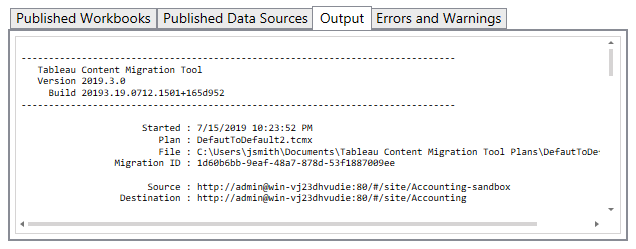
You can save this log by clicking Save Log.
![]()
Errors and warnings
The Errors and Warnings tab highlights any problems that occurred during the migration.
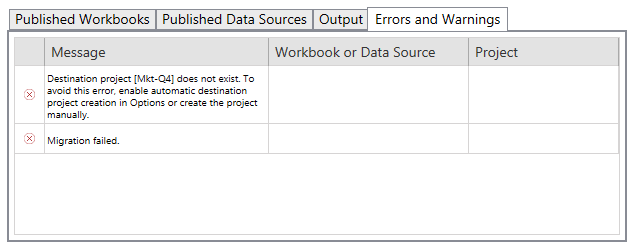
You can correct these and rerun your plan. When you have completed your migration and saved your plan, click Done to finish.
![]()
Who can do this
Tableau site user with an Explorer role or higher. To migrate content, you must have View and Download/Save a Copy capabilities for workbooks on the source site and View and Publish capabilities for target projects on the destination site. For more information, see Permissions.
