Comprehensive Steps to Publish a Workbook
- In Tableau Desktop, open the workbook you want to publish.
- Select Server > Publish Workbook.
If the Publish Workbook option doesn’t appear on the Server menu, make sure a worksheet or dashboard tab is active (not the Data Source tab).
If necessary, sign in to a server. For Tableau Cloud, enter https://online.tableau.com. For more information, see Sign in to Tableau Server or Tableau Cloud from Tableau Desktop.
- In the Publish Workbook dialog box, select the project, enter a name for the workbook, and add search tags.
Tags help users find related workbooks when they browse the server. Separate tags using a comma or space. To add a tag that contains a space, put the tag in quotation marks.

- For Permissions, accept the default project settings.
Generally, a site admin manages permissions on the server. If you think your workbook is an exception, work with your administrator to determine the best course of action. See Set Permissions as You Publish a Data Source or Workbook.
- For Data Sources: select Edit to change whether the data is embedded in the workbook or published separately, or how people authenticate with data sources.
- If you’re publishing an extract and want to set up a refresh schedule, you must select Embed password or Allow refresh access.
- If your workbook connects to a Tableau data source, we recommend embedding the password. If you instead choose to prompt users, they need extra permissions on the data source.
For more information, see Set Credentials for Accessing Your Published Data.
- Configure Variable publishing options that are available for this workbook.
- Click Publish.
- (Optional) Set up a refresh schedule for each extract you published.
The publishing workflow guides you through these steps. For some data types you publish to Tableau Cloud, the publishing process starts Tableau Bridge on your computer.
For more information, see Schedule Extract Refreshes as You Publish a Workbook.
Variable publishing options
The following options appear when they’re appropriate for the workbook.
Show or hide sheets
By default, Tableau Desktop publishes all sheets in a multiple-sheet workbook. In the Sheets section of the Publish Workbook dialog box, you can specify which sheets to include. Hiding sheets is useful when you want to publish a dashboard or story without showing the worksheets that were used to create it.
Important: Hiding sheets isn’t a security measure. Anyone who has the Download Workbook/Save a Copy capability can access the hidden sheets. Other editing permissions can also allow access to hidden sheets. For more information, see Content Access and Ownership(Link opens in a new window) in Tableau Server Help.
Show sheets as tabs
If you select multiple sheets to show, you can specify how users navigate them.
-
Select the Show Sheets as Tabs check box to provide tab-based navigation.

-
Clear the check box to allow people to open only one view at a time.
How sheet tabs are configured also impacts permissions. When a workbook shows sheets as tabs, workbook-level permission rules are applied to the sheets. When the sheets aren’t shown as tabs, any changes made to workbook permissions don’t apply to the individual sheets (aka views). View-level permissions must be set independently. See the Set Content Permissions(Link opens in a new window) tab in the Permissions(Link opens in a new window) topic for more information.
Show selections
Use Show Selections to highlight a particular portion of the view when others open the workbook. Make your selections in Tableau Desktop before you start the publishing process.
Include external files
In general, if your views contain information that isn't available on the server, you can use Include External Files during publishing. With this option, you can include a local flat file. When you check Include External Files, Tableau packages a copy of the local file (like Excel or CSV) within the workbook. This allows others to see the data, but it creates a static snapshot.
The availability of the Include External Files option depends on whether you’re publishing to Tableau Server or Tableau Cloud.
For Tableau Server
If you're publishing content that references data or images on a mapped drive, you can select the Include External Files when you publish. Alternatively, you can change the connection information so that the workbook references the UNC path to the data. For example, you could change D:\datasource.xls to \\filesrv\datasource.xls.
For Tableau Cloud
You can publish a workbook connected to on-premises data, such as Excel or text private network data, such as Excel files and SQL Server data, which Tableau Cloud can't connect to directly. Check to see if the connections in the data source are supported by Tableau Bridge. For more information, see Supported Connectors(Link opens in a new window).
Do one of the following:
- If all the connectors are supported by Tableau Bridge, you can ignore the Include External Files check box, but you must use Bridge to keep the data fresh. For more information, see, see Use Tableau Bridge to Keep Tableau Cloud Data Fresh(Link opens in a new window).
- If one of the connections in the data source isn’t supported by Tableau Bridge, you can select the Include External Files check box. Tableau Cloud can then refresh the data that can be connected to directly. File-based data can’t refresh and its data remains static in this case
- For flat files (Excel, .csv, .txt), you can skip checking Include External Files. A shadow extract is created and the view should display properly.
Furthert, if you are publishing a data source independently (not embedded in a workbook), checking the Include External Filesbox will not store the file on the server. To keep a published data source updated, you must use Tableau Bridge and ensure the file is hosted in a reachable network location (UNC path).
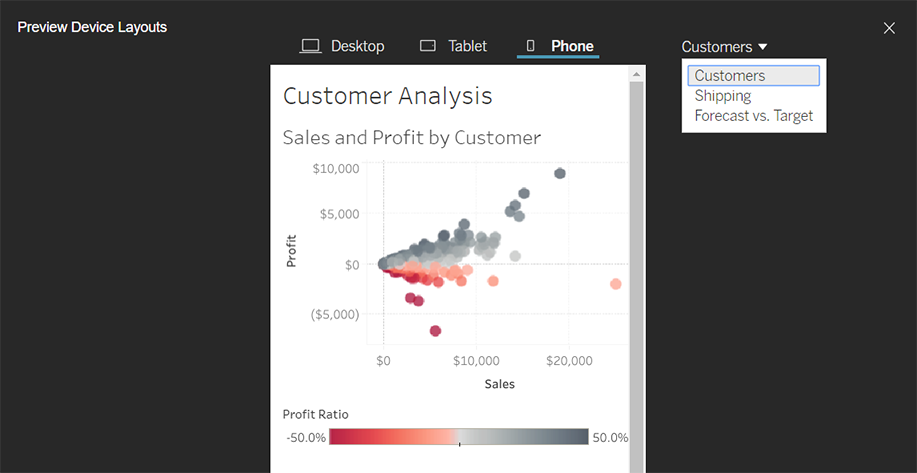
Preview device layouts
To see how your designs appear on mobile devices, click Preview device layouts in the browser when publishing is complete. Then choose a device type above the viz, and a specific dashboard from the menu at the right.
If you don't like a device preview, open the workbook in Tableau Desktop, adjust device layouts, and republish.
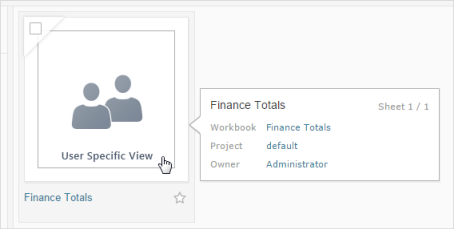
Choose how to generate thumbnails for workbooks with user filters
On the server, users can browse Tableau content with a thumbnail view. These thumbnail images are based on workbook sheets. If your workbook contains user filters, you can specify which user’s filter to use when creating the thumbnails. For example, if you want the thumbnail to show all regions of a sales forecast, generate thumbnails based on a user who can see all regions.
In the following scenarios, a generic image appears in place of the view thumbnail.
- The user you select doesn’t have permission to see the data.
- The data is from a Tableau Server data source that uses data source filters, user calculations, impersonation, or other user references.
To learn more about user filters, see Restrict Access at the Data Row Level.