Permissions
Permissions determine how users can interact with content such as workbooks and data sources. Permissions are set in the permission dialog or via the REST API(Link opens in a new window). At the top of the dialog, permission rules configure capabilities for groups or users. Below, the permissions grid displays the effective permissions for users.

There are several interrelated topics that discuss how to think about, set, and manage permissions. The main topics are:
- This topic, which covers the fundamentals, how to set permission rules for projects and other content, and permission considerations for specific scenarios.
- Permission Capabilities and Templates, which covers in detail the various capabilities that are used to build permission rules.
- Manage Permissions with Projects, which covers using projects to manage permissions and how nested and locked projects impact permissions.
- Effective permissions, which covers how permission rules are evaluated and how final permissions are determined.
- Permissions, Site Roles, and Licenses, which covers how permissions interact with site roles and licenses to determine what a user can do on a site.
Additionally, if Data Management is licensed, permissions for external assets have additional considerations. For more information, see Manage Permissions for External Assets.
Permissions fundamentals
Projects and groups
Tableau sites use projects to organize content and groups to organize users. Managing permissions is easier when permission rules are:
- Set at the project level instead of on individual pieces of content.
- Established for groups instead of individuals.
Permissions can only be established for users, groups, projects, or assets that already exist. For more information about creating users and groups, creating projects, and publishing content, see Manage Users and Groups, Use Projects to Manage Content Access , and Publish Data Sources and Workbooks(Link opens in a new window).
Capabilities and permission rules
Permissions are made up of capabilities—the ability to perform actions like view content, web edit, download data sources, or delete content. Permission rules establish what capabilities are allowed or denied for a user or group on an asset.
For more information about capabilities and permission rule templates, see Permission Capabilities and Templates.
Note: When talking about permissions in general, it’s common to see a phrase like "a user must have the delete permission." This is easy to understand in a broad context. However, when working with permissions at a technical level like in this article, it’s more accurate to say "the delete capability." In this topic we’ll use the more precise term capability, but you should be aware that you might see permission in other places.

For a breakdown of the capability icons and their meanings, see Permission Capabilities and Templates.
The interplay between license level, site role, and potentially multiple permission rules factor into the final determination of what a user can or can’t do. For each user this becomes their effective permissions. For more information, see Effective permissions.Some tasks such as creating new workbooks from a browser (web authoring) or moving content might require specific configurations of several capabilities rather than being captured in a single capability. For more information, see Permission settings for specific scenarios.
Set permissions
Permission rules are set differently at the project level, at the content level, or when publishing content from Tableau Desktop.
Note: The phrase "project permissions" can have two meanings. There are the permission capabilities for a project itself—View and Publish—that control how a user can interact with a project. There is also the concept of project-level permission rules for other content types. In this article “project-level permissions” means permission rules for workbooks, data sources, and the other assets that are configured in the permission dialog for a project. This is in contrast to “content-level” permission rules that can be set on a specific workbook, data source, etc.
For administrators, project owners, and project leaders
To set permissions at the project level:
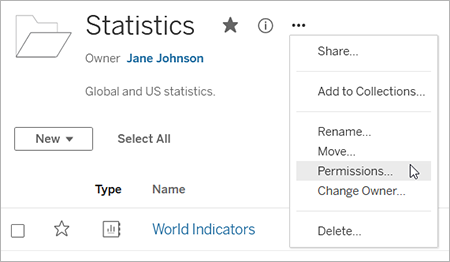
- Navigate to the project
- Open the Actions menu (...) and click Permissions.
The permissions dialog opens. This dialog has two main areas: permission rules at the top and the effective permissions grid below. Each content type has a tab. The image below shows the Data Sources tab.

With a row selected at the top, the effective permissions grid populates. Use this to verify permissions. Hovering provides information about why the capability is allowed or denied for that specific user.
- To modify an existing permission rule, select the appropriate tab for that content type and click a capability.
- To create a rule, click + Add Group/User Rule and start typing to search for a group or user. For each tab, choose an existing template from the dropdown box or create a custom rule by clicking the capabilities.
- When finished, click Save.
- If the "None" template is selected, the button will say "Delete Rule".
One click sets the capability to Allowed, two clicks sets it to Denied, and a third click clears the selection (Unspecified).
Set project permissions for all content types
Remember that the permissions dialog for a project contains tabs for each type of content. You must set permissions for each type of content at the project level or users will be denied access to that content type. A capability is only granted to a user if they’re expressly allowed it. Leaving a capability as Unspecified will result in it being denied.
Tip: Every time you create a permission rule at the project level, make sure you look through all the content type tabs.
Configure the asset permissions setting
Permission rules set at the project level act as a default for content saved in that project and any nested projects it contains. Whether those project-level default rules are kept uniform or are able to be edited depends on the Asset permissions setting. This setting can be configured in two ways, either Locked or Customizable. For more information, see Lock asset permissions.
For administrators, project leaders, and content owners
If project Asset permissions are Customizable, permissions for individual assets can be modified. The information below isn’t relevant to assets in locked projects. For more information, see Lock asset permissions.
Tip: While it is possible to set permissions on individual assets in Customizable projects, we recommend managing permissions at the project level.
Set permissions on assets
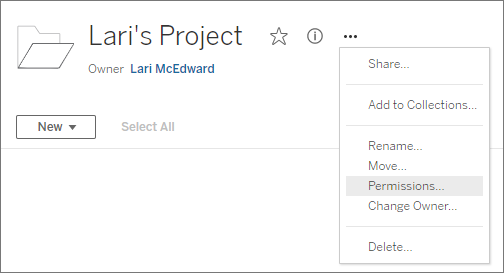
- Navigate to the asset (such as a workbook, data source, or flow)
- Open the Actions menu (...) and click Permissions.
The permissions dialog opens. This dialog has two main areas: permission rules at the top and the effective permissions grid below. (Note the lack of tabs across the top—an asset-level permissions dialog has no tabs.)
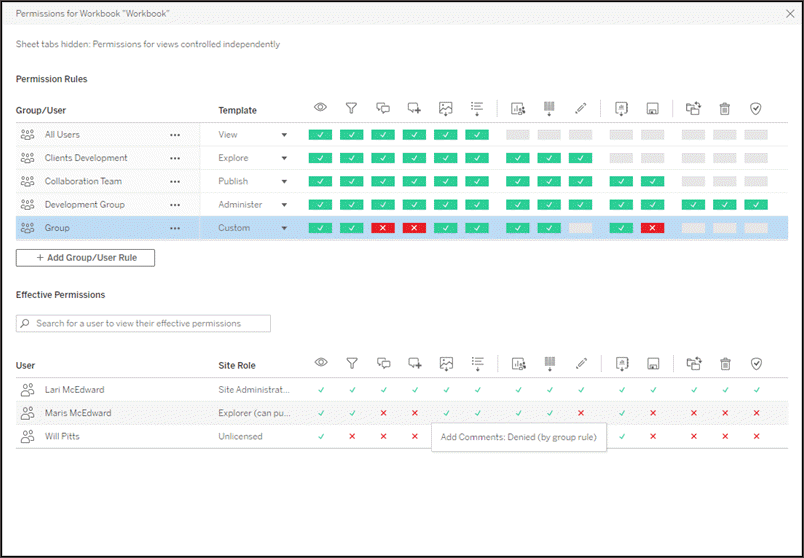
With a row selected at the top, the effective permissions grid populates. Use this to verify permissions. Hovering over a capability square provides information about why the capability is allowed or denied for that specific user.
- To modify an existing permission rule, click a capability.
- To create a rule, click + Add Group/User Rule and start typing to search for a group or user. Choose an existing template from the dropdown or create a custom rule by clicking the capabilities.
- When finished, click Save.
- If the "None" template is selected, the button will say "Delete Rule".
One click sets the capability to Allowed, two clicks sets it to Denied, and a third click clears the selection (Unspecified).
Set permissions on a view
Tip: While it’s possible to set view-level permissions within a workbook, we strongly recommend managing permissions at the project (or, if necessary, workbook) level.
If a workbook is published with Show Sheets as Tabs checked, the views in that workbook will inherit all permissions set for the workbook. The permission dialog for a view will be read-only.
In some situations, it may be valuable to specify permissions on a view independently from the workbook that contains it. If the workbook is published with Show Sheets as Tabs unchecked (sheet tabs hidden), the views will start with the workbook permissions but will be independent thereafter and can be set independently. Note that this means if the permission rules are modified for the workbook, those changes won’t be applied to the views—each view’s permissions will need to be managed individually.
See Show or Hide Sheet Tabs for more information.
For content publishers
If project Asset permissions are Customizable, permissions for individual assets can be set when publishing from Tableau Desktop. The information below isn’t relevant for content in locked projects. For more information, see Lock asset permissions.
Tip: While it’s possible to set permissions on individual assets in Customizable projects, we recommend managing permissions at the project level.
- From the publishing dialog , click the Edit link for Permissions.
If the Edit link is unavailable, permissions are locked to the project and can’t be modified except by the project owner, project leader, or an administrator. - The Add/Edit Permissions dialog shows any existing permission rules. Click Add to add a permission rule or Edit to modify an existing permission rule
- Select the group or user from the left pane. You can expand a group to see which users it contains.
- Use the selector at the top of the right pane to choose an existing template, or use the radio buttons to create a custom rule.
Note that effective permissions can’t be inspected from the publishing dialog.
- When finished, click OK and resume publishing.
Note: Permissions can’t be set while publishing flows from Tableau Prep Builder. To set permissions on a flow, refer to the steps for Project-level permissions or Content-level permissions.
Clean up the All Users group
By default, all users are added to an "All Users" group that has basic permissions for content. To start with a clean slate when building your own permission rules, we recommend that you delete the rule entirely or edit the rule for All Users to remove any permissions (set the permission role template to None). This helps prevent any ambiguity down the road by reducing the number of rules that applies to any given user and therefore making effective permissions easier to understand.
Permission settings for specific scenarios
Certain actions require combinations of permission capabilities and possibly site roles. The following are some common scenarios and their necessary permission configurations
Saving, publishing, and overwriting
In the context of permissions, saving is essentially publishing. As such, the Overwrite and Save a Copy capabilities can only be given to users with a site role that allows publishing: Administrator, Creator, or Explorer (can publish). Explorer or Viewer site roles can’t publish, overwrite, or save a copy.
- The Publish capability for a project allows a user to publish content into that project.
- The Overwrite capability for content allows a user to save over an existing piece of content. By saving over the content, the user becomes the owner of that content. The Overwrite capability also allows users to edit minor aspects of existing pieces of content, such as the description for a metric or the synonyms for a data role. Editing the existing content in this way doesn't change the owner of the content.
- The Download / Save a Copy or Save a Copy capability for content allows a user to use the Publish As... menu option to save a new copy of the content. This is usually done in conjunction with web authoring and means the user can save their modifications.
- Saving a copy of a workbook is distinct from autosave, which maintains any changes as a draft.
A place to publish
It’s important to note that users aren’t able to Publish or Publish As a piece of content unless they have the Publish capability for at least one project, because all content must be published into a project. Without the Publish capability at the project level, the content can’t be published.
Overwrite and claim ownership
In web editing, the Publish option in the File menu only appears to the content owner. If a user who isn’t the owner has the Overwrite capability (allowing them to save the content), they must use File > Publish As... and name the workbook the exact same name. This prompts a warning that they’re about to overwrite the existing content, which they can do. Conversely, a user with only the Save a Copy capability trying to use the same name gets an error stating they don’t have permission to overwrite the existing content.
If a user who isn’t the content owner overwrites content, they become the owner, with all the permissions that entails. The original owner’s access to the content is then determined by their permissions as a user rather than the owner.
Note: Download/Save a Copy is a joint capability for workbooks. Explorers can be given this capability but they’re only able to download the workbook, not save a copy using Publish As. Giving the capability to Explorer (can publish), Creator, or Administrator site roles gives them both the ability to download workbooks and save a copy using the publishing options in the File menu.
Web Editing and Web Authoring
Web editing and web authoring allows users to edit or create workbooks directly in the browser.
The permission capability is called Web Edit and the site setting is called Web Authoring. This section refers to any web-based editing or publishing action as web authoring.
To enable this functionality, there are several requirements.
- User site role: The user must have the appropriate site role.
- Viewers can never web edit.
- Explorers can be given the web edit capability but can’t publish. Essentially, they can use web editing to answer deeper questions based on existing content on the fly, but can’t save their edits.
- Explorers (can publish) or Site Administrator Explorers can publish, but they can only use data that is already published to the site.
- Creators, Site Administrator Creators, and Server Administrators can publish and create data sources.
- Permission capabilities: The user must have the necessary permission capabilities based on the desired functionality.
Required Permission Capability Settings
| Desired functionality | Minimum Site Role |
|
|
|
|
|
| Web author without being able to save | Explorer |
|
|
|
Optional |
|
| Web author and save as new content | Explorer (can publish) |
|
|
|
|
|
| Web author and save (overwrite) content | Explorer (can publish) |
|
|
|
|
|
| Web author with new data and save new content | Creator |
|
Optional | Optional |
|
Optional |
Optional indicates this capability isn’t involved in the desired functionality
Data access for published Tableau data sources
Data sources published to a Tableau site can have native authentication as well as permissions within the Tableau environment.
When the data source is published to the Tableau site, the publisher can choose how to Set Credentials for Accessing Your Published Data, which addresses how data source credentials are handled (such as requiring users to log into a database or enter their credentials for Google Sheets). This authentication is controlled by whatever technology holds the data. This can be embedded when the data source is published, or the data source publisher can choose to prompt the user for their credentials to the data source. For more information, see Publish a Data Source.
There are also data source capabilities that allow or deny users the ability to see (View) and connect to the published data source (Connect) in the context of Tableau. These capabilities are set like any other permissions in Tableau.
When a workbook is published that uses a published data source, the author can control how the Tableau authentication behaves for someone consuming the workbook. The author sets the workbook’s access to the published data source, either as Embed password (using the author’s Connect access to the data source) or Prompt users (using the Connect access of the person viewing the workbook), which may require data source authentication as well.
- When the workbook is set to Embed password, anyone who looks at the workbook sees the data based on the author’s access to the data source.
- If the workbook is set to Prompt users, the Tableau-controlled access is checked for the data source. The person consuming the workbook must have the Connect capability for the published data source to see the data. If the published data source is also set to Prompt user, the viewer must also enter their credentials for the data source itself.
| Workbook authentication to the data source | Data source authentication to the data | How data access is evaluated for someone consuming the workbook |
| Embed password | Embed password | User sees the data as if they were the workbook author |
| Embed password | Prompt user | User sees the data as if they were the workbook author. (The author is prompted for data source authentication, not the user.) |
| Prompt user | Embed password | User must have their own Connect capability to the published data source |
| Prompt user | Prompt user | User must have their own Connect capability to the published data source and are prompted for their credentials to the underlying data |
Note that this applies to consuming a workbook, not web editing. To web edit, the user must have their own Connect capability.
For information on embedding passwords when you publish Tableau content such as a data source or workbook that uses a virtual connection, see Virtual connections(Link opens in a new window) in the Tableau Server help.
Allow other users to refresh extracts
Users with the Explorer (can publish) site role or higher can be granted the Extract Refresh capability on workbooks or data sources. This capability provides users with the same interface as the asset owner for triggering an extract refresh. The extract must either be a published data source or, if it's local to a workbook, have embedded credentials.
Because extract refreshes can be resource intensive and may already be scheduled, consider the following best practices when assigning the Extract Refresh capability:
- Infrequently used extracts: Grant users the ability to refresh extracts on demand and consider turning off redundant or unneeded scheduled refreshes.
- Regularly used extracts: Consider scheduling extract refreshes and limiting the Extract Refresh capability for on-demand refreshes.
- Assign the extract refresh capability as a backup to prevent bottlenecks dependent on the asset owner or administrators, rather than granting these permissions broadly.
Move content
To move an item, open its Action menu (...) and click Move. Select the new project for the item, then click Move Assets. If Move is unavailable or there are no available destination projects, verify the appropriate conditions are met:
- Administrators can always move assets and projects to any location.
- Project leaders and project owners can move assets and nested projects among their projects.
- Note that non-administrators can’t move projects to become top-level projects
- Other users can move assets only if all three of the following requirements are met:
- Creator or Explorer (Can Publish) site role.
- Publishing rights (View and Publish capabilities) for the destination project
- Owner of the content, or—for workbooks and flows—having the Move capability.
When moving a database with its tables, the user must have the Move capability for both the database and its tables.
For information about how permissions are handled when moving content and projects, see Move projects and content.
Metrics (retired 2024.2)
Tip: The information in this section is for the legacy metrics feature, which was retired in Tableau Cloud in February 2024 and in Tableau Server version 2024.2. For information about permissions for Tableau Pulse metrics, see Set Up Your Site for Tableau Pulse.
Retirement of the legacy metrics feature
Tableau's legacy metrics feature was retired in Tableau Cloud in February 2024 and in Tableau Server version 2024.2. In October 2023, Tableau retired the ability to embed legacy metrics in Tableau Cloud and in Tableau Server version 2023.3. With Tableau Pulse, we've developed an improved experience to track metrics and ask questions of your data. For more information, see Create Metrics with Tableau Pulse to learn about the new experience and Create and Troubleshoot Metrics (Retired) for the retired feature.
Metrics are created from views in published workbooks. Users can create metrics if they:
- Are a Creator or Explorer (can publish) site role
- Have the Publish capability on a project
- Have the Create/Refresh Metric capability for the relevant workbook
For more information, see Create and Troubleshoot Metrics (Retired) and Set Up for Metrics.
Note: Prior to 2021.3, the ability to create a metric on a view was controlled by the Download Full Data capability.
Because metrics are independent assets, it’s important to note that the permissions for metrics are managed independently from the view they were created from. (This is unlike data-driven alerts and subscriptions, where the content of the alert or subscription can only be seen if the user has the correct permissions for the view itself.)
Although the capabilities for metrics are straightforward, the View capability should be considered carefully. It may be possible for a workbook with restricted permissions to be the basis for a metric with more open permissions. To protect sensitive data, you might want to deny metric creation for specific workbooks.
Metrics display data from their owner’s perspective
When you create a metric, you capture your perspective of the data from that view. This means that any users who can access your metric will see the data as it appears to you. If the data in the view is filtered based on your credentials, the data you see might be different from what other users see when they access the same view. Limit the View capability for your metric if you're concerned about exposing your perspective of the data.
Explain Data
When Explain Data is available, a user can select a mark in a view and click Run Explain Data in the mark’s Tooltip menu. A combination of settings must be enabled to make Explain Data available in editing mode and viewing mode.
Requirements for authors to run Explain Data or edit Explain Data settings in editing mode:
- Site setting: Availability of Explain Data set to Enable. Enabled by default.
- Site role: Creator, Explorer (can publish)
- Permissions: Run Explain Data capability set to Allowed. Unspecified by default. If you open a workbook (Tableau version 2022.1 or earlier) that used this permission in Tableau version 2022.2 or later, you must reset the Run Explain Data capability to Allowed.
Note: The Download Full Data capability for a Creator or Explorer (can publish) controls whether they see the View Full Data option in Extreme Values explanations. Viewers are always denied the Download Full Data capability. However, all users can see record-level details when the Extreme Values explanation type is enabled in Explain Data settings.
Requirements for all users to run Explain Data in viewing mode:
- Site setting: Availability of Explain Data set to Enable. Enabled by default.
- Site role: Creator, Explorer, or Viewer
- Permissions: Run Explain Data capability set to Allowed. Unspecified by default. If you open a workbook (Tableau version 2022.1 or earlier) that used this permission in Tableau version 2022.2 or later, you’ll need to reset the Run Explain Data capability to Allowed.
Show or Hide Sheet Tabs
In the context of published content, sheet tabs (also referred to as tabbed views) is a distinct concept from sheet tabs in Tableau Desktop. Showing and hiding sheet tabs in Tableau Desktop refers to hiding sheets in the authoring environment. For more information, see Manage Sheets in Dashboards and Stories.
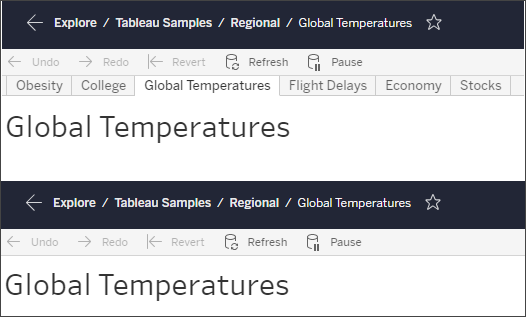
Showing and hiding sheet tabs (turning tabbed views on or off) for published content refers to navigation in a published workbook. When sheet tabs are shown, published content has navigational sheet tabs along the top of each view.
This setting also impacts how permissions function and may have security implications (see note).
Note: It’s possible to have the View capability for a view without the View capability for the workbook or project that contain it. Normally if a user lacks the View capability for a project and workbook, they wouldn’t know those assets exist. If they have the View capability for a view, however, a user may be able to see the project and workbook name when looking at the view, such as in the navigational breadcrumb. This is expected and accepted behavior.
Turn off tabbed views to allow independent view permissions
Although it isn’t recommended as a general practice, there are times when it can be useful to set permissions on views independently of the workbook that contains them. To do so, three conditions must be met:
- The workbook must be published—there’s no way to set view permissions during publishing.
- The workbook must be in a customizable project.
- The workbook can’t show sheets as tabs (tabbed views must be hidden).
When a workbook shows sheets as tabs, all views inherit the workbook permissions and any changes to the workbook permissions affect all of its views. When a workbook in a customizable project doesn’t show tabbed views, all views assume the workbook permissions upon publication, but any subsequent changes to the workbook’s permission rules won’t be inherited by the views.
Changing the configuration of sheets as tabs on a published workbook will also impact the permission model. Show Tabs overrides any existing view-level permissions and reinstate the workbook-level permissions for all views. Hide Tabs breaks the relationship between the workbook and its views.
- To configure sheets as tabs on a published workbook, open the Actions menu (...) for the workbook and select Tabbed Views. Choose Show Tabs or Hide Tabs as desired.
- To configure sheets as tabs during publishing, refer to Show sheets as tabs(Link opens in a new window).
- To set view-level permissions, see Set permissions on assets.
Important: In a customizable project, any modifications to the workbook-level permissions won’t be applied if navigational sheet tabs are hidden (aka tabbed views are off). Changes to permissions must be made on individual views.
Collections
For information on managing permissions in Collections, refer to Collections.