Filter Your Data
Note: Starting in version 2020.4.1, you can now create and edit flows in Tableau Server and Tableau Cloud. The content in this topic applies to all platforms, unless specifically noted. For more information about authoring flows on the web, see Tableau Prep on the Web in the Tableau Server(Link opens in a new window) and Tableau Cloud(Link opens in a new window) help.
Tableau Prep provides various options that you can use to filter your data. For example, use Keep Only or Exclude to do one-click filtering on a specific value for a field in a profile card, data grid or results card or select from a variety of filter options for more complex filtering needs. You can also keep or remove entire fields.
Filter data at any step in the flow. If you want to simply change a specific value, you can select Edit Value to edit the value in-line or replace the value with Null. For more information about editing field values, see Edit field values(Link opens in a new window).

Keep or remove fields
As you work with your data in your flow you might want to remove unwanted fields. In the Profile pane or the data grid in any cleaning or action step, select one or more fields and right-click or Ctrl-click (MacOS) and select Remove to remove the selected fields, or select Keep Only (Tableau Prep Builder version 2019.2.2 and later and on the web) to keep only the selected fields and remove all unselected fields.

Hide fields
Supported in Tableau Prep Builder version 2021.1.4 and later and Tableau Server or Tableau Cloud starting in version 2021.1.
If you have fields in your flow that don’t need cleaning, but you still want to include them in your flow, you can hide the fields instead of removing them. Data for those fields won't be loaded until you either unhide the fields or run your flow to generate your output.
When you hide fields, a new profile card called Hidden Fields is automatically added to the Profile pane, letting you easily unhide fields from the list as you need them.
You can include hidden fields in most operations, but joins, aggregations and pivots require the field to be unhidden to use it in one of these step types. If you hide the field after it has been used in one of these operations, the field will show as hidden and the operation won't be affected.
All hidden fields are tagged with an eye ![]() icon.
icon.

Hide and unhide fields
To hide or unhide fields, you must be in an Input step or in a Clean step. In the Clean step you can hide or unhide fields from the Profile pane, date grid and List view.
From the Input step
- Connect to your data.
- In the Input step select the field you want to hide or unhide.
Click the eye
 icon to hide or unhide the field.
Multi-selecting fields in the Input step is supported starting in version 2023.1.

From the Profile pane
- Select the fields you want to hide.
Right-click, Ctrl-click (MacOS), from the More options
 menu, or from the toolbar menu, select Hide Field or Hide Fields.
A new profile card is generated showing your hidden fields.

- To unhide fields, in the Hidden Fields profile card, select one or more fields, and either click the eye icon, right-click, or Ctrl-click (MacOS) and select Unhide Fields from the menu.
From the List view
- In a Clean step, on the toolbar, click the List view
 icon to change to the list view.
 - Select one or more fields to hide or unhide.
Click the eye
icon to hide or unhide the fields.
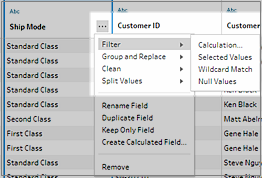
Filters available for each data type
| Data type | Available filters |
| String | Calculation, Wildcard Match, Null Values, Selected Values |
| Number | Calculation, Range of Values, Null Values, Selected Values |
| Date and Date & Time | Calculation, Range of Dates, Relative Date, Null Values, Selected Values |
Where are my filter options?
To see the different filter options available for your fields, on the profile card, in the data grid or in the results pane, click the More options![]() menu. To see the menu on the data grid, you must click the Hide profile pane
menu. To see the menu on the data grid, you must click the Hide profile pane button first, and then click More options
![]() .
.
 |  |
Calculation filter
When you select Calculation, the Add Filter dialog box opens. Enter the calculation, verify that it's valid, and click Save. Starting in version 2021.4.1, you can also include parameters in calculation filters. For more information, see Apply user parameters to filter calculations.
Note: In the Input step, this is the only type of filter that is available. All other filter types are available in the profile cards, data grid or results pane.

Selected Values filter
In Tableau Prep Builder version 2019.2.3 and later and on the web, you can use the Selected Values filter to pick and choose the values that you want to keep or exclude for a field, even values that aren't in your sample. In the right pane, click the Keep Only or Exclude tab to select your action, then enter search terms to search for values or click Add a value  to add values that are in your data set but aren't included in your sample. Click Done to apply your filter.
Note: This filter option isn't available for Aggregation or Pivot step types.

Range of Values filter
Filter out values that fall within a specific range. When you select Range of Values, you can specify a range or set minimum or maximum values.

Range of Dates filter
Filter out values that fall within a specific date range. When you select Range of Dates, you can specify a range of dates or set a minimum or maximum date.

Relative Date filter
Use the Relative Dates filter to specify the exact range of years, quarters, months, weeks or days that you want to see in your data. You can also configure an anchor relative to a specific date and include null values.
Note: “Last” date periods include the complete current unit of time, even if some dates haven't occurred yet. For example, if you select the last month and the current date is 7th January, Tableau will display dates for 1st January to 31st January.

Wildcard Match filter
When you select Wildcard Match, you can filter the field values to keep or exclude values that match a pattern. In the filter editor, select the Keep Only or Exclude tab, enter a value to match and then set the Matching Options criteria to return the values you are looking for.
The filtered results display in the left pane of the filter editor so that you can review and experiment with your results. Once you have the results you want, click Done to apply your change.

Null Values filter
When you select Null Values you can filter the values in the selected field to show only null values or exclude all null values.
