Create Workbooks with Salesforce Data
You can quickly author and analyze Salesforce data in Tableau. Sign in to Salesforce directly from your Tableau Cloud site and select the clouds you want to explore. Tableau integrates your Salesforce data to create a project with ready-to-use starter workbooks and data sources - choose to explore them on your own or share them with other users on your site.
What’s included with the Salesforce project
The Salesforce project includes starter workbooks and data sources, all built using your Salesforce data. Use the starter workbooks to quickly answer questions about your Nonprofit, Sales, and Service Clouds, or connect to Salesforce Admin Insights to see usage trends in your organization.
Nonprofit Cloud
Connect to Nonprofit Cloud to analyze your organization's programs and drive impact.
Includes starter workbooks for: Nonprofit Case Management - Service Delivery and Staff Capacity, Nonprofit Case Management Assessments, Nonprofit Case Management Enrollment, Nonprofit Case Management Intake, and Nonprofit Fundraising Overview.
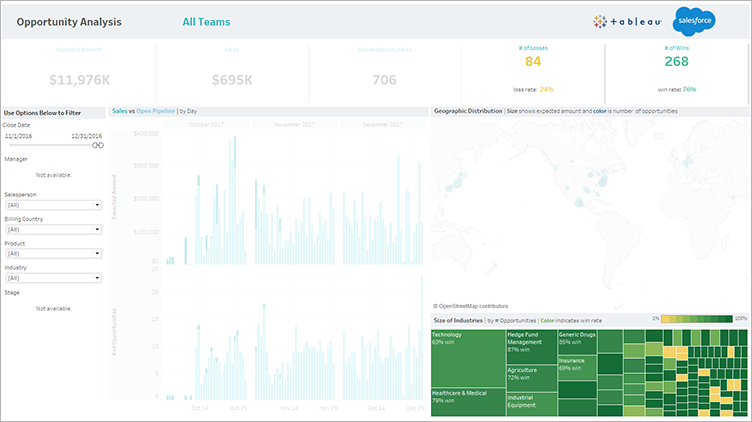
Sales Cloud
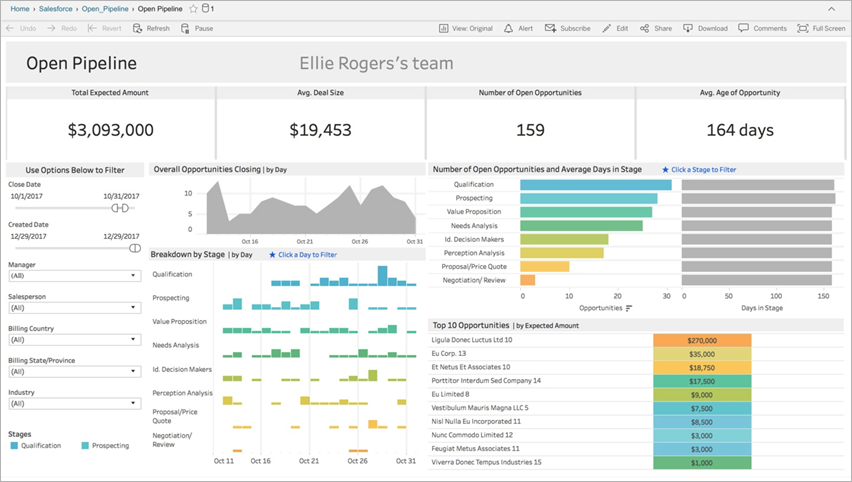
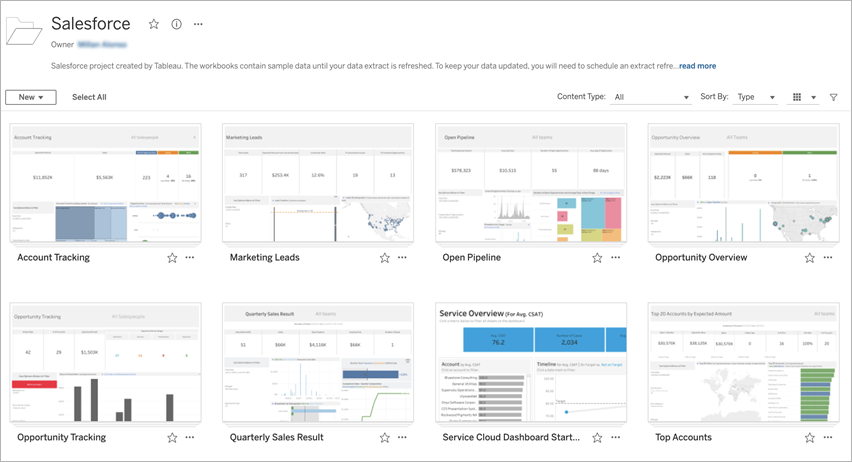
Connect to Sales Cloud to visualize your sales funnel and better support your sales team.
Includes starter workbooks for: Account Tracking, Open Pipeline, Opportunity Overview, Opportunity Tracking, Quarterly Sales Results, Top Accounts, and Marketing Leads.
Salesforce Admin Insights
Connect to Salesforce Admin Insights to visualize usage trends and engagement with your organization.
Includes starter workbooks for: Salesforce Admin Insights.
Service Cloud
Connect to Service Cloud to analyze and explore your critical service metrics and cases.
Includes starter workbooks for: Service Overview and Case Tracking.
Connect to Salesforce
Connecting to your Salesforce data is simple. Once you sign in and select the Clouds to explore, Tableau creates a new project and publishes workbooks and data sources on your site. When the publishing process is complete, you can edit the resulting workbooks(Link opens in a new window) just like any other, quickly customizing them for your needs.
To connect to Salesforce, you must be an administrator with the Site Administrator Creator site role and have API access to your Salesforce instance. API access requires Salesforce Professional Edition or higher. For more information, see Set Users’ Site Roles.
-
Sign in to your Tableau Cloud site as an administrator, and select Settings > Integrations.
-
On the Integrations tab, click Connect to Salesforce Data and complete prompts to authorize access to Salesforce.
-
In the Connect to Salesforce dialog window, select the Clouds you want to explore.
-
Specify a name and initial permissions for the project. You can set permissions for Only administrators, or choose to Inherit permissions from the Default project. For more information, see Permissions.
-
Review your selections and click Publish.
At this point, you’ve created a new project and published starter workbooks. While Tableau prepares extracts of your Salesforce data, sample data appears in the workbooks so you can explore the layout. You’ll receive an email when your Salesforce data is refreshed and added to the workbooks.
Note: Depending on the size of your data source, it may take some time to create extracts. You can view the status of your Salesforce extracts on the Background Tasks for Extracts administrative view.
To see your project and other content you have access to, from the navigation menu, click Explore.
Use existing Salesforce credentials
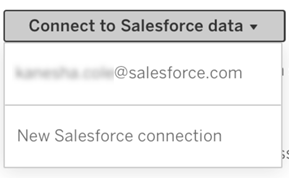
If you've already connected to Salesforce, you can use existing credentials to create additional starter workbooks.
From the Integrations tab, click Connect to Salesforce Data, and select the Salesforce credentials you want to use from the drop-down menu. Tableau creates a new project every time workbooks publish on your site.
Note: Workbooks will publish on the site with your Salesforce credentials embedded. All users with permission to view the workbook will be able to see data based on these credentials.
Schedule refreshes to keep data fresh
To make sure you see the latest information when viewing workbooks or connecting to data sources, you’ll need to schedule refreshes. By default, the Salesforce data extracts created when publishing starter workbooks will not refresh automatically. For more information about refresh schedules, see Schedule Refreshes on Tableau Cloud.
Follow the steps below to schedule extract refreshes:
-
In Tableau Cloud, navigate to the project containing your Salesforce content.
-
Select the data source you want to refresh, click Actions, and choose Refresh Extracts...
-
In the Create Extract Refresh dialog window, select the Refresh Type and Refresh Frequency, and click Create.
Subscriptions
You’re automatically subscribed to Salesforce workbooks and will receive notification emails every time the data is refreshed. If you want to update your subscription preferences, see Create a Subscription to a View or Workbook.
Change permissions for projects, workbooks, and data sources
After connecting to your Salesforce data, you can choose how users interact with the Salesforce project, workbooks, and data sources published on your site. Permissions are a great way to make sure the right users have access to the starter content and enable them to build workbooks of their own. For more information about configuring permissions on your site, see Permissions.
Create workbooks in Tableau Cloud
With your Salesforce data sources, you can create new workbooks through web authoring in Tableau Cloud or use Ask Data to query and create visualizations automatically.
-
Web Authoring: Connect to your data directly in Tableau Cloud to explore and create custom data visualizations of your own. For more information, see Creators: Get Started with Web Authoring(Link opens in a new window) in Tableau Desktop help.
-
Ask Data: Interact with your data by simply typing a question and see automatic data visualizations in response. For more information, see Automatically Build Views with Ask Data(Link opens in a new window) in Tableau Desktop help.
Fix grayed-out views by replacing field names
If your organization has customized the data structure of your Salesforce data, you may need to match those changes in the starter workbooks after your data loads in them. For example, if your organization has renamed the Salesforce “Account” field to “Customer”, you'll need to make a corresponding change in workbooks to avoid grayed-out views like this:
To fix grayed-out views:
-
Above the dashboard, click Edit.
-
Navigate directly to the grayed-out sheet.
-
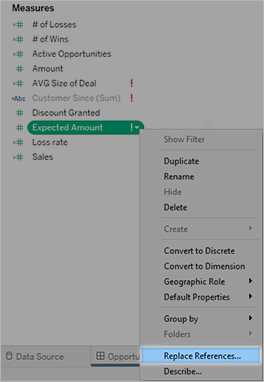
In the Data pane at the left, look for red exclamation points (!) next to field names, which indicate that your organization uses different names.
-
Right-click each of those fields, and choose Replace References. Then select the correct field name from the list.