Use a Custom Domain with Tableau Cloud
You can use a custom domain to redirect traffic to your Tableau Cloud site. A custom domain lets you configure a subdomain, such as analytics.example.com, to embed and access published content without exposing Tableau site details. With a custom domain, you can direct users to content using your organization's URL.
This topic describes how to configure a custom domain in Tableau Cloud site settings. For information about configuring a custom domain using the Tableau REST API, see Tableau REST API OpenAPI Endpoints(Link opens in a new window).
Before you begin
To add a custom domain to Tableau Cloud, you must meet the following user and TLS certificate requirements.
User requirements
-
Administrator access to your Tableau Cloud site. You must have administrator access to the Tableau Cloud site on which you want to add a custom domain.
-
Administrator privileges to the DNS configuration of the parent domain. You must have administrator privileges to add CNAME records to the DNS configuration of the parent domain.
A parent domain is the primary domain in a DNS hierarchy. It contains child domains, or subdomains. For example,
example.comis a parent domain, while subdomains such asabc.example.comorxyz.example.comsit beneath it.
TLS certificate requirements
Acquire a valid TLS certificate chain file and private key from a trusted authority (for example, Verisign, Thawte, Comodo, GoDaddy). You can’t use an internal certificate issued by your organization.
When acquiring a TLS certificate for the custom domain, follow these guidelines and requirements:
-
TLS certificate that includes the full certificate chain. The TLS certificate must include the full certificate chain in the order of identity certificate > intermediate certificate > root certificate.
-
Valid PEM-encoded x509 certificates. All certificate files must be valid PEM-encoded x509 certificates.
-
SHA-256 is used as the signing algorithm. Certificate files must use the SHA-2 (256 bit or 512 bit) signature hash.
-
RSA is used as the encryption algorithm. Certificate files must use the RSA encryption algorithm.
-
Common Name that matches the custom domain. The certificate Common Name (CN) must match the custom domain entered on the Tableau Cloud Settings page. Tableau doesn’t support wildcard certificates, such as
*.example.com, or check the Subject Alternate Name (SAN) field. -
Expiration within 90 days to 365 days. The certificate expiration date must be within 90 days to 365 days from the issue date. The maximum validity period for publicly trusted TLS certificates is 397 days, which includes the standard 30-day grace period from the provider.
Note: When you add or replace a certificate, it must have at least 88 days of remaining validity from the upload date.
-
Valid RSA private key file. In addition to the certificate file, upload a corresponding TLS certificate key file. The key file must be a valid RSA private key with extension
.keyand have a bit length of 2048 bits or higher.
PEM-encoded file example
This example shows the format for PEM-encoded certificate and private key files. The content has been shortened for illustration purposes.
Important: The certificate chain file must start with -----BEGIN CERTIFICATE-----. Additionally, don’t include comments between the -----END and -----BEGIN sections of the certificate chain file.
Certificate chain file
-----BEGIN CERTIFICATE-----
MIIGiTCCBHGgAwIBAgIIY5dpPr2gQjowDQYJKoZIhvcNAQENBQAwgYsxCzAJBgNV
...
A7jcIyoWtoPP1rZ3VjP4LIVVro8pce7MNtD9CzUYN8kQk1iftBKWjcCd20Km
-----END CERTIFICATE-----
-----BEGIN CERTIFICATE-----
MIIGqzCCBJOgAwIBAgIIYifB1rX/1pAwDQYJKoZIhvcNAQELBQAwgYUxCzAJBgNV
...
g+qyDLoAy/td0D8ha8SlWt5ee2cAF9Xu7Y9jNe21Ug==
-----END CERTIFICATE-----
-----BEGIN CERTIFICATE-----
MIIDpjCCAyugAwIBAgIQDTYMRISRziTtCzVA2HCg3TAKBggqhkjOPQQDAzBhMQsw
...
7LX35CV+ypuVTbKZkjATTvROgmL5AgTbsAg=
-----END CERTIFICATE-----
Private key file
-----BEGIN PRIVATE KEY-----
MIIEpAIBAAKCAQEAgN9TePjxsgvjZ8QERQILf3YbofaBHGks5E3k9dRP0cx7sw1O
...
xpAh+dRkr0vjsj/ZnJyYfaUQDcV4wslFcn6eKoINEQrtBj40P1iqig==
-----END PRIVATE KEY-----
Compatibility with SAML single sign-on (SSO)
If your Tableau Cloud site uses SAML authentication, you must update your identity provider (IdP) configuration after adding a custom domain. Specifically, update the following values in your IdP to reflect your site's custom domain:
- Entity ID
- ACS URL
For more information about configuring SAML authentication, see SAML.
Note: Starting in June 2026, custom domains are supported with SCIM(Link opens in a new window) integration.
Compatibility with custom OAuth connections
When configuring a new OAuth client, use your custom domain for the Redirect URL. For example, if your custom domain is analytics.example.com, the Redirect URL is https://analytics.example.com/auth/add_oauth_token. Existing workbooks continue to function as expected, regardless of your custom domain configuration. For more information about custom OAuth clients, see OAuth Connections.
Add a custom domain to your site
To add a custom domain to your Tableau Cloud site, use the steps in the following sections.
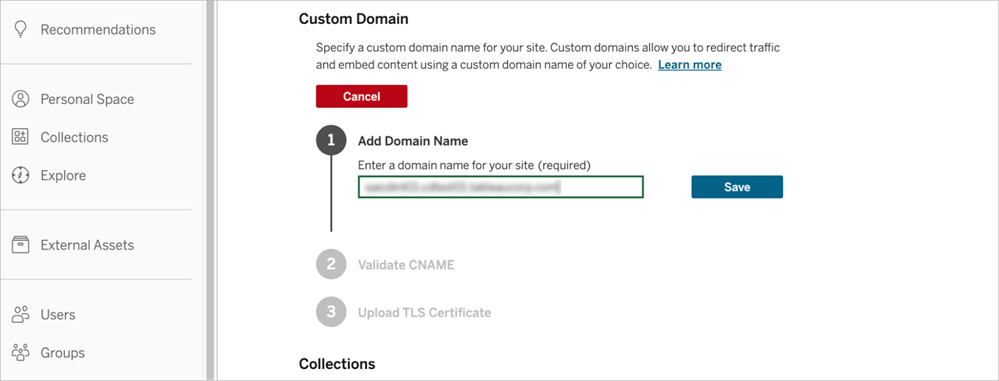
Add domain name
-
Sign in to the Tableau Cloud site as an administrator and select Settings.
-
On the General tab, scroll to Custom Domain.
-
Enter a domain name for your site. The value must be a subdomain. Tableau doesn't support parent domains, such as
example.com, for the custom domain. -
Select Save.
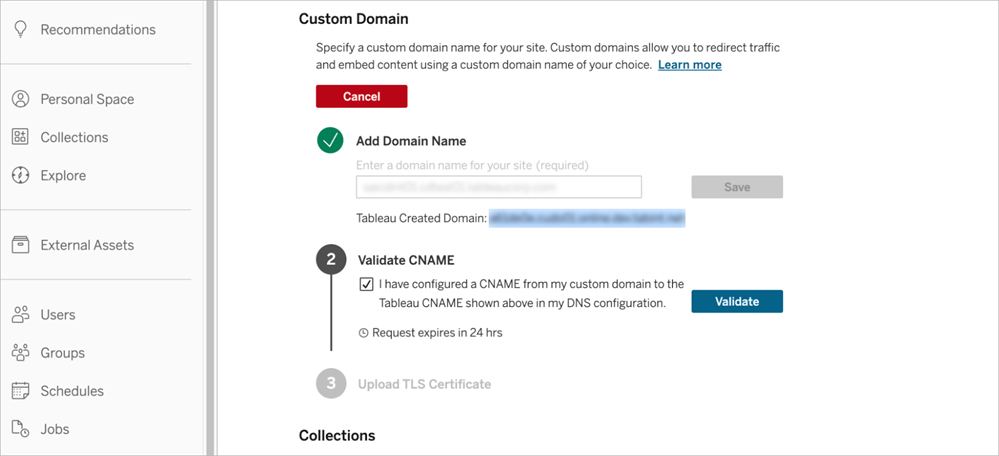
Validate CNAME
-
Using the Tableau Created Domain displayed in Step 1, create a CNAME record in your DNS configuration. This step is performed outside Tableau Cloud and requires network administrator access in your organization. CNAME validation expires 48 hours after adding the custom domain, at which point you must restart the process.
Tip: Use a time to live (TTL) value of 30–60 minutes for the CNAME record.
-
Select the check box to confirm you’ve created a CNAME record from the chosen custom domain to the Tableau CNAME in your DNS configuration.
-
Select Validate.
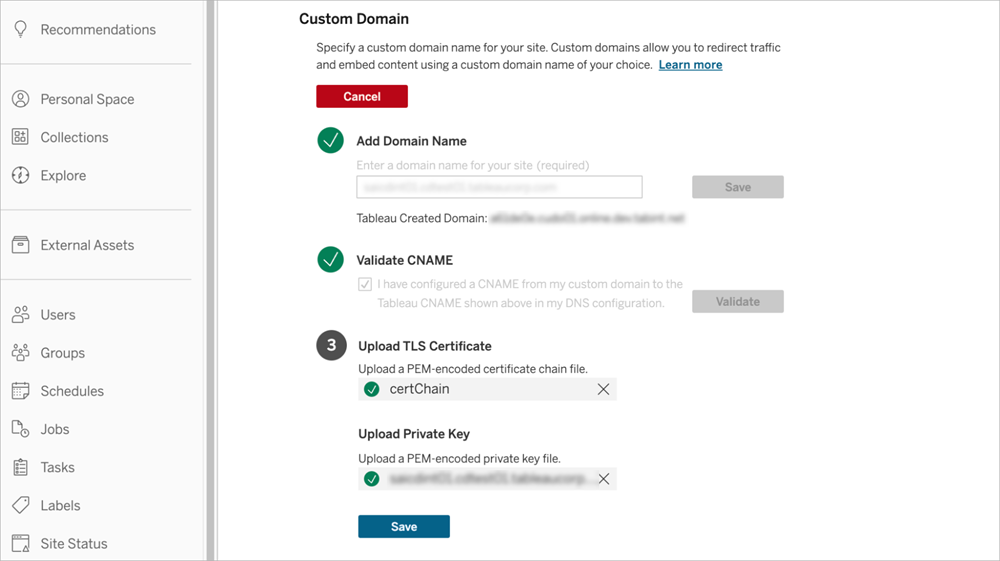
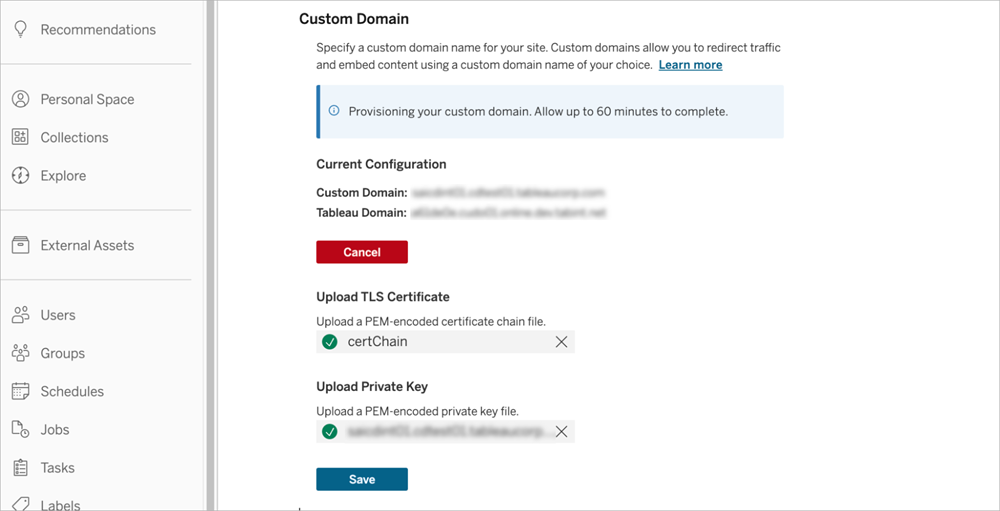
Upload TLS certificate and private key
-
Upload the full certificate chain and private key files associated with the custom domain. The certificate chain must include root, intermediate, and end-user certificates. For more information about certificate requirements, see TLS certificate requirements.
-
Select Save.
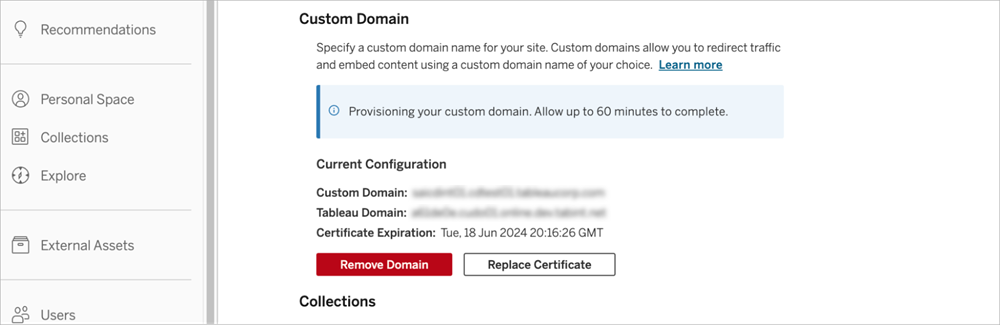
After the files are successfully uploaded, provisioning your domain can take up to 60 minutes. A status notification appears while provisioning is in progress and disappears when the custom domain is available.
What to expect when using a custom domain
When you use a custom domain, a few user interface changes apply.
-
The URL in the address bar shows the custom domain instead of the Tableau Cloud pod hosting your site. This change doesn’t affect sign-in. Users can still access the site from https://online.tableau.com(Link opens in a new window).
-
The Share dialog link and embed code point to the custom domain instead of the Tableau Cloud pod hosting your site. This happens because the dialog populates fields using information from the current URL. For content that was shared or embedded previously, the URL continues to reference the Tableau Cloud pod. To use the custom domain instead, you must update previous links using the new Share dialog values. For more information about sharing Tableau content, see Share Web Content(Link opens in a new window) in Tableau Desktop help.
-
For users who are members of multiple sites, the site picker isn’t available when accessing content with a custom domain. To switch sites, sign out and authenticate to the site you want.
Replace or update TLS certificate
Replace the TLS certificate and key files as they near expiration or when your organization requires it. The certificate expiration date is displayed in the Custom Domain section of the Settings page.
To replace the TLS certificate and private key files:
-
Sign in to the Tableau Cloud site as an administrator and select Settings.
-
On the General tab, scroll to Custom Domain.
-
Select Replace Certificate and follow the steps listed in Upload TLS certificate. The replacement certificate must have at least 88 days of remaining validity. If the certificate expires in fewer than 88 days from the upload date, the upload fails.
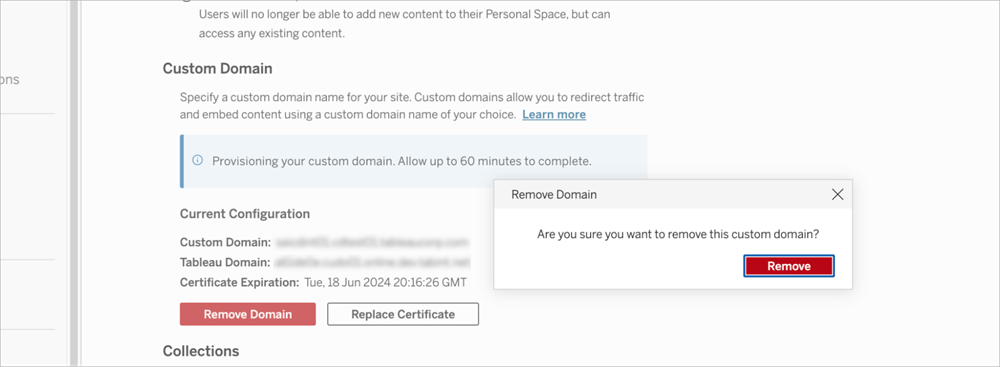
Remove the custom domain
When you remove a custom domain, the URLs used to share and embed content are no longer available. To avoid broken links, have users update their bookmarks and embedded content before removing the domain. The updated URLs must use the name of the Tableau Cloud pod hosting their site. For the list of Tableau Cloud pods, see Salesforce Trust(Link opens in a new window).
To remove the custom domain from your site:
-
Sign in to the Tableau Cloud site as an administrator and select Settings.
-
On the General tab, scroll to Custom Domain.
-
Select Remove Domain > Remove.
Troubleshooting
Delayed DNS propagation when adding a CNAME record
If you experience a delay while adding the CNAME record to your DNS configuration, verify that the CNAME reflects the expected mapping. You can use command-line tools such as dig and nslookup to verify the CNAME mapping.
Certificate errors
To correct certificate errors, follow the on-screen instructions and verify the certificate meets the TLS certificate requirements.