Filtering Data
Use filtering to select a subset of the data in the view to focus on that data or to exclude data from the view.
Filtering using marks or headers
You can click a mark to select the data represented by just that mark, use your cursor to select a set of marks or click on a header to select a section of data. When you do, the data for the marks or header is highlighted and other data is dimmed. To see all the data again, click anywhere outside the marks.
Keeping or excluding data
You can remove selected data altogether, or you can keep just selected data and remove all the other data in a view.
To keep or exclude data:
-
Select the marks or headers for that data that you want to keep or exclude.
-
Right-click (Control-click on Mac) the mark or header, and then click Keep Only or Exclude.
Using filter cards
Filters are cards on the worksheet that display a range of data. If the author of the workbook has included a filter card, you can include and exclude data in the view using the card.
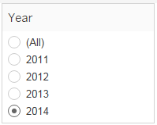
For categorical data fields, filters display as a list of check boxes or radio buttons for each member of the field. For example, a filter for a Date field might list the following members: 2011, 2012, 2013, 2014.

To select data in the filter, select the members you want to include.
The author of the workbook can also set the filter to exclude values, which means the selected members will be filtered from the view and the rest are included. This mode is useful when you usually want to show most members and exclude just a few.
For measures (numerical data), filters are displayed as a slider. Slide the handles left and right to define the range of values you want to include in the view. For example, you could use a filter for the Sales measure to only include values between $50,000 and $85,000.

To specify exact lower and upper values, click one of the numbers on the filter and enter a new value.
Resetting filters
You can reset the filters along with other changes you've made by either clicking the Undo button or reverting the workbook to its last saved state. For more information about how to revert a workbook, see Reverting Workbooks.
