Use Context Filters
By default, all filters that you set in Tableau are computed independently. That is, each filter accesses all rows in your data source without regard to other filters. However, you can set one or more categorical filters as context filters for the view. You can think of a context filter as being an independent filter. Any other filters that you set are defined as dependent filters because they process only the data that passes through the context filter.
You may create a context filter to:
- Force a filter to be carried out first.
- Create a dependent numerical or top N filter. You can set a context filter to include only the data of interest, and then set a numerical or a top N filter.
For example, suppose you’re in charge of breakfast products for a large grocery chain. Your task is to find the top 10 breakfast products by profitability for all stores. If the data source is very large, you can set a context filter to include only breakfast products. Then you can create a top 10 filter by profit as a dependent filter, which would process only the data that passes through the context filter.
Create Context Filters
To create a context filter, select Add to Context from the context menu of an existing categorical filter. The context is computed once to generate the view. All other filters are then computed relative to the context. Context filters:
- Appear at the top of the Filters shelf.
- Are identified by a gray color on the Filters shelf.
- Cannot be rearranged on the shelf.
As shown below, the Ship Mode dimension is set to be the context for a view. The Region filter is computed using only the data that passes through Ship Mode.
You can modify a context filter by:
- Removing the field from the Filters shelf – If other context filters remain on the shelf, a new context is computed.
- Editing the filter – A new context is computed each time you edit a context filter.
- Selecting Remove from Context – The filter remains on the shelf as a standard filter. If other context filters remain on the shelf, a new context is computed.
Speed up Context Filters
To improve performance of context filters, especially on large data sources, follow these general rules.- Using a single context filter that significantly reduces the size of the data set is much better than applying many context filters.
- Complete all of your data modeling before creating a context. Changes in the data model, such as converting dimensions to measures, require recomputing the context.
- Set the necessary filters for the context and create the context before adding fields to other shelves. Doing this work first makes the queries that are run when you drop fields on other shelves much faster.
- If you want to set a context filter on a date you can use a continuous date. However, using date bins like YEAR(date) or context filters on discrete dates are very effective.
Note: Context filters can adversely affect any query performance improvements when you use the Assume Referential Integrity option in the Data menu of the data source. For more information, see Assuming Referential Integrity for Joins.
Example: Create Context Filters
This example walks you through how to create a context filter. First you’ll filter a view to show the top 10 products by sales. Then you’ll create a context filter on product category so you can see the top 10 furniture products.
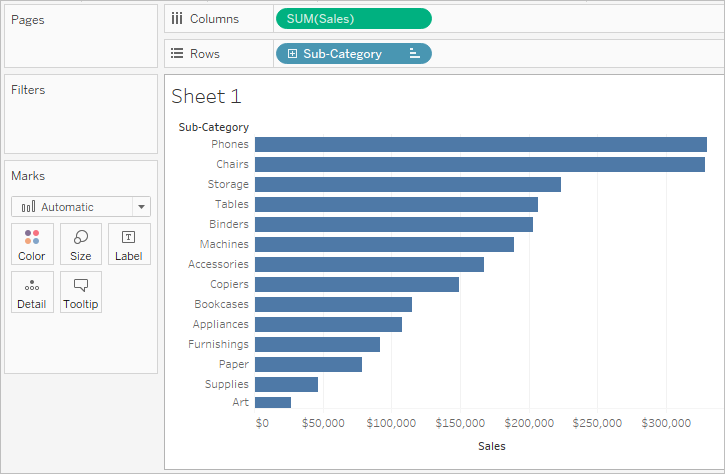
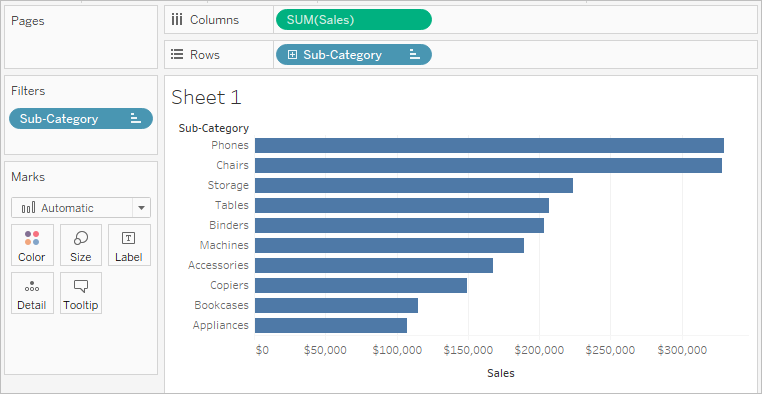
Use the Sample - Superstore data source to create the initial view shown below. The view shows the sales for all sub-categories, sorted with the highest sale at the top.
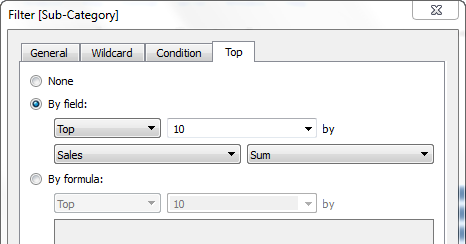
Now create a Top 10 filter to just show the top selling products. You can create this filter by dragging the Sub-Category field to the Filters shelf. In the Filter dialog box, switch to the Top tab and define a filter that is Top 10 by Sum of Sales. See Filter Data from Your Views(Link opens in a new window) to learn more about defining a Top N filter.
When you click OK, you’ll see that the view is filtered to show the top 10 product sub-categories in terms of sales.
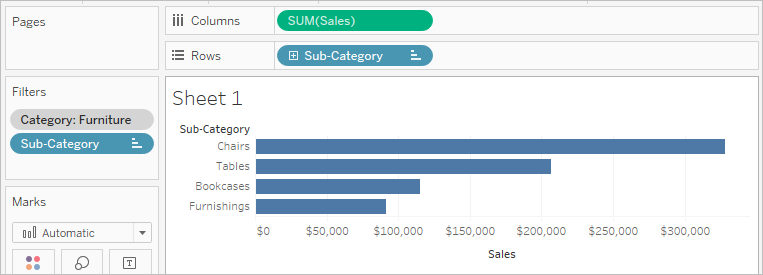
Now, let’s add another filter to show only furniture products. Drag the Category field to the Filters shelf and select only Furniture. When finished, click OK.
The view is filtered but instead of 10 products, it now shows 3. This is because by default all filters are evaluated separately and the view shows the intersection of the results. So this view shows that three of the top 10 overall products are furniture products.
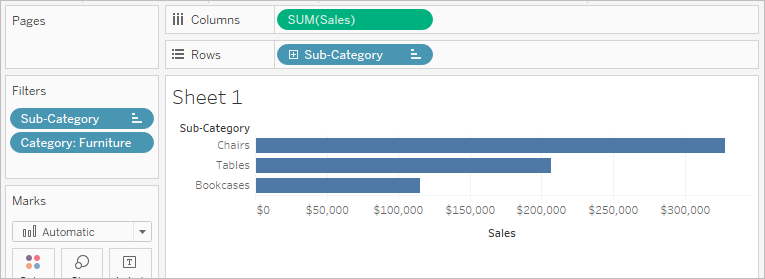
To find out what the top 10 furniture products are we need to make the Category filter a context filter. Right-click the field on the Filters shelf and select Add to Context.
The filter is marked as a context filter and the view updates to show the top four furniture products. Why not 10? Because only four of the sub-categories contain furniture. But we now know that the Top 10 filter is being evaluated on the results of that context.