How to Create a Calculated Member
If you are using a multidimensional data source, you can create calculated members using MDX formulas instead of Tableau formulas. A calculated member can be either a calculated measure, which is a new field in the data source just like a calculated field, or a calculated dimension member, which is a new member within an existing hierarchy. For example, if a dimension Product has three members (Soda, Coffee, and Crackers) you can define a new calculated member Beverages that sums the Soda and Coffee members. When you then place the Products dimension on the Rows shelf it displays four rows: Soda, Coffee, Crackers, and Beverages.
Note: In Tableau, multidimensional data sources are supported only in Windows.
Defining Calculated Members
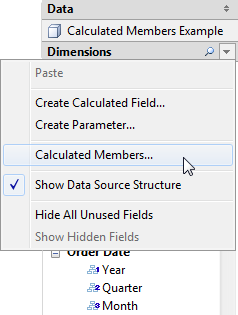
You can define a calculated dimension member by selecting Calculated Members from the Data pane menu. In the Calculated Members dialog box that opens, you can create, delete, and edit calculated members.

To create a new calculated member do the following:
-
Click New to add a new row to the list of calculated members at the top of the dialog box.

-
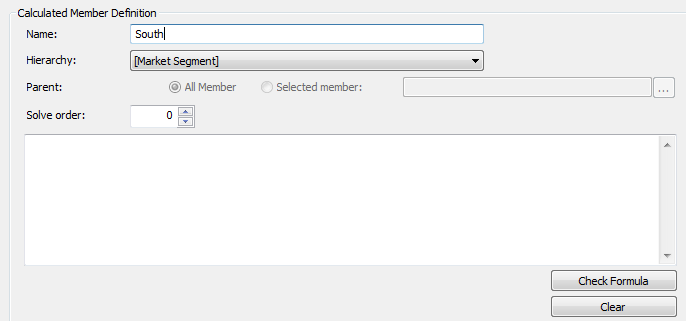
Type a Name for the new calculated member in the Member Definition area of the dialog box.

-
Specify the Parent member for the new calculated member. All Member is selected by default. However, you can choose Selected Member to browse the hierarchy and select a specific parent member.
Note: Specifying a parent member is not available if you are connected to Oracle Essbase.
-
Give the new member a solve order.
Sometimes a single cell in your data source can be defined by two different formulas. The solve order defines the precedence given to each formula. Formulas with a lower solve order are solved first. The default solve order is zero.
-
If you are connected to a Microsoft Analysis Services data source, the calculation editor contains a Run before SSAS check box. Choose this option to execute the Tableau calculation before any Microsoft Analysis Services calculations. For information on connecting to Microsoft Analysis Services data sources, see Microsoft Analysis Services
-
Type or paste an MDX expression into the large white text box.
-
Click Check Formula to verify that the formula is valid.
-
When finished, click OK.
The new member displays in the Data pane either in the Measures area, if you chose [Measures] as the parent member, or in the Dimensions area under the specified parent member. You can use the new member just like any other field in the view.
