Access Tableau Content in Microsoft 365
The Tableau app for Microsoft 365 is available in Teams, Word, and PowerPoint. With the Teams app, you can interact with views (visualizations) and metrics and share them in messages, channels, and meetings. With the Word and PowerPoint add-ins, you can add image snapshots of views and metrics to your documents and slides and refresh those snapshots to keep them up to date.
For the Tableau app to be available in Microsoft 365, your admin must deploy it and connect it to your Tableau site. For information about installing the Tableau app as an admin, see Set Up the Tableau App for Microsoft 365.
Note: If you've set the language in Tableau or Microsoft 365 to a Tableau-supported language other than English (US), you might see text in English that isn't localized.
Use the Teams app
If your admin didn’t pre-install the app for you but has deployed it for your organization, you can install the app yourself. To learn how, see Add an app to Microsoft Teams(Link opens in a new window) in the Microsoft Teams documentation.
The Teams app has three tabs: Tableau, Pulse, and Configuration. The Tableau tab shows the views that you’ve added as favorites. The Pulse tab shows the metrics that you follow and a summary of insights about those metrics. Be aware that the Pulse tab appears only for Tableau Cloud sites. The Configuration tab lets you set the site that Microsoft Teams checks when you search for content and, if you’re a Tableau admin, add and remove site configs.
If you don’t have any favorite views or followed metrics, you won’t see any content in the app. Sign in to your Tableau site directly to add views as favorites and to follow metrics. For more information, see Mark Favorites and Follow Metrics. Though it's possible to add other types of content as favorites, none of your favorite content besides views appears in the Tableau app. If you want to see all of the views in a workbook, add each individual view to your favorites.
Explore content in Teams
On the Tableau or Pulse tab, click on the card for a view or metric to open the full interactive version. The interactive view or metric allows you to see more details about the data and filter the data based on different dimensions or time ranges.
Search for content
If you know the name of a view or metric, you can search for it in the Tableau app. You can also enter the URL to a view in the search bar to access specific content or custom views.
-
On the Tableau or Pulse tab, select the search icon.

-
Enter the name of the view or metric.
-
Select the open button next to the view or metric name to go to the interactive version.
Follow a metric
Each metric represents a unique set of filters. When you filter an existing metric, you create a new metric if one doesn’t already exist with those filters. Follow the new metric to see it on your Pulse tab and in your insight summary.
-
On a metric, select the follow (subscribe to this metric) icon.

You can unfollow the metric by selecting the button again.
Share content
-
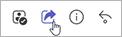
On a view or a metric, select the share icon.
-
Select the person, group chat, or channel to share with.
-
Select Share.
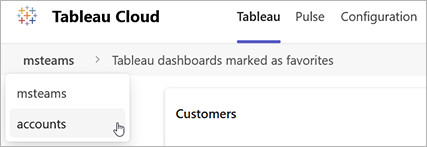
Switch sites
-
On the Tableau or Pulse tab, select the site name from the breadcrumb menu. If more than one site is connected to the Tableau app, you see a list of sites.
-
Select the site that you want to switch to.
Add Tableau content to channels and meetings
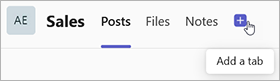
Pin content in a channel tab
-
In the channel where you want to pin Tableau content, select the + icon to add a tab.
-
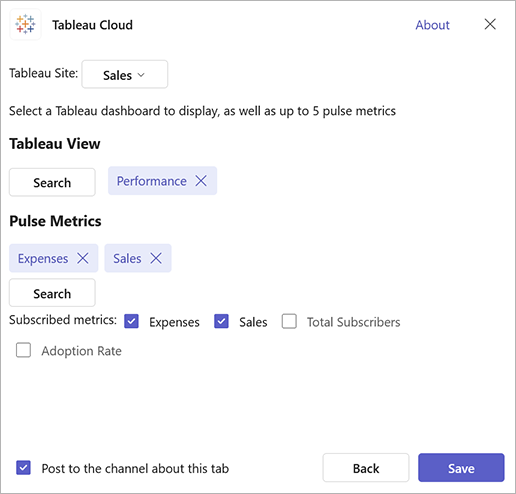
From the list of apps, select the Tableau app.
-
Select the content to pin. To pin a custom view, select the search button and enter the view URL. You can pin one view and up to five metrics per tab. To pin more Tableau content, add a second tab.
-
Select Save.
-
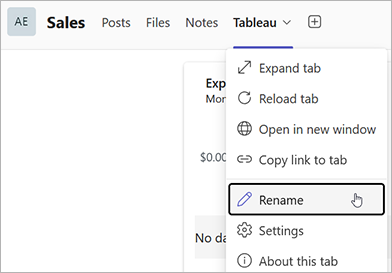
Optionally, to rename the tab, select the dropdown menu on the tab, then select Rename.
Add Tableau content to a meeting
You must first create a meeting and then add Tableau content. You can't add third-party apps during the creation of a meeting.
-
In the Calendar app, find the meeting that you want to add Tableau content to, then select Edit.
-
Select More options.
-
From the toolbar, select Apps.
-
From the list of apps, select the Tableau app.
-
Select the content to pin.
-
Select Save.
-
Save the changes to the meeting.
-
After you start the meeting, select the Tableau tab. This opens the Tableau content in a side panel, which is visible to only you.
-
On the side panel, select the share to stage button. This makes the content visible to others in the meeting. Be aware that the content that you share appears to others as you see it, similar to how screen sharing works. If there's row-level security on the data, everyone in the meeting sees your view of the data.
Share Tableau content in messages
If you know the URL for a view or metric, you can quickly share that content by pasting the URL into a message. The Tableau message extension turns the link into a card that shows the content title and a thumbnail, with a button to open the full interactive view or metric. If you don’t know the URL of the content that you want to send, you can search for content to share.
-
On a message, select the + (Actions and apps) icon.
-
Select the Tableau app.
-
Search your Tableau site for the view or metric that you want to share.
-
Select the view or metric. It takes a moment to generate the card for this content.
-
Send the message.
Use the Word and PowerPoint add-ins
The Tableau add-in appears on the Home tab in Microsoft Word and PowerPoint. To learn how to access an add-in, see Start using your Office Add-in(Link opens in a new window) in the Microsoft documentation. Note that for the Tableau app to be available for you to use, your Microsoft 365 admin must first deploy it and connect it to a Tableau site.
Add a visualization or metric to documents and slides
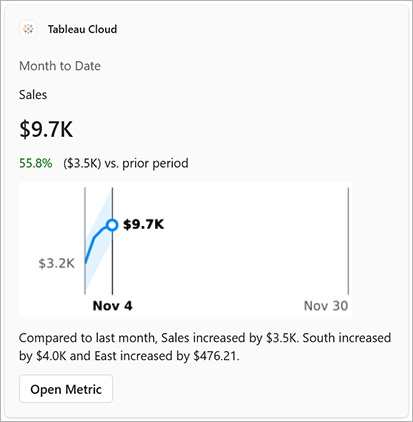
With the Tableau add-in, you can add an image snapshot of a visualization or metric to your documents and slides. Note that Tableau Pulse metrics are available only for Tableau Cloud.
These images show the time at which they were added and the user who added them, and the image links to the content in Tableau Cloud or Tableau Server. The image is the same for all users, so if there’s row-level security applied to the data, the image shows the view of the data that’s specific to the user who added the image. If other users open the image link in Tableau Cloud or Tableau Server, those users see the interactive view or metric with their credentials applied.
-
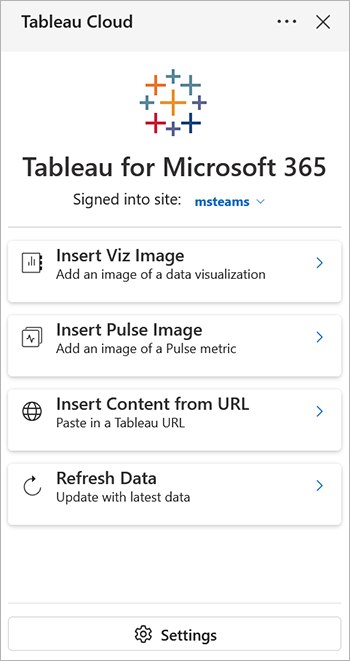
From the Home tab, select the Tableau add-in.
-
Select Insert Viz Image or Insert Pulse Image.
-
Either search for the name of the view or metric that you want to add, or select from your favorite views or followed metrics.
-
On the preview of the view or metric, select Insert Image.
If you have the Tableau site URL of the content that you want to add, you can instead choose Insert Content from URL.
Use a custom view to show filtered data
To add a filtered view of the data, insert a custom view.
-
Open the view in Tableau Server or Tableau Cloud.
-
Filter the view to show the data that you want to include in the snapshot, then create a custom view. For more information, see Use Custom Views.
-
Open the Tableau add-in in Word or PowerPoint.
-
Select Insert Content from URL, then paste in the URL for the custom view.
Refresh a visualization or metric
The image is a snapshot taken at the time that you add it. If the image no longer represents the latest data, refresh it.
-
From the Home tab, select the Tableau add-in.
-
Select Refresh Data. The Tableau add-in identifies all of the Tableau images in your document or slides.
-
Select the content that you want to refresh, then select Refresh Selected.