Migration Plans: Plan Options
The last step of creating a migration plan in the Tableau Content Migration Tool is configuring the plan options.
Step 1: Configure options
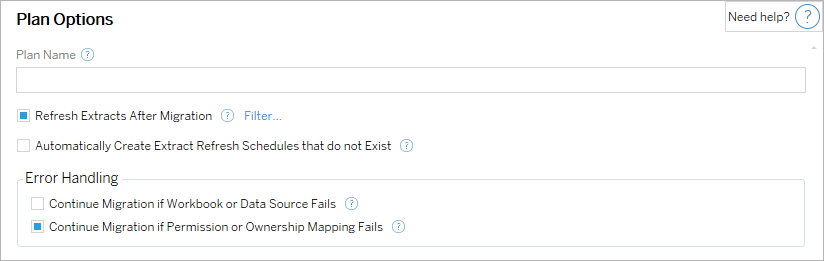
The Plan Name is the name of the plan as it will appear in Content Migration Tool. We recommend using a user-friendly name for your plan name.
The following are available options:
Refresh Extracts After Migration: If selected, data extracts will be refreshed immediately after migration if Content Migration Tool detects they have been modified during migration. Click the Filter link to exclude specific extracts. For more information, see Exclude extract refreshes below.
Automatically create Extract Refresh Schedules that do not Exist: Automatically creates destination extract schedules that do not exist. If not ticked, source schedules that do not exist on the destination
Continue Migration if Workbook or Data Source Fails: If checked, errors migrating a workbook or data source will not cause the migration to stop. The errors will be logged and the migration will continue. Errors during version control will always stop the migration.
Continue Migration if Permission or Ownership Mapping Fails: If ticked, errors copying permissions or ownership will not cause the migration to stop. The errors will be logged and the migration will continue.
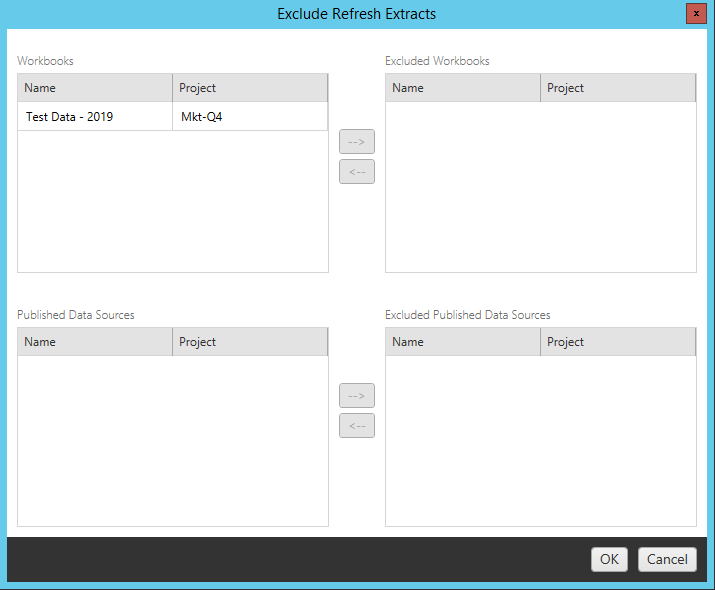
Exclude extract refreshes
By clicking Filter next to Refresh Extracts After Migration, you can choose the workbooks or published data sources that will not be refreshed automatically. Use the arrow buttons to select the items you want to exclude, and clickOK.
Step 2: Version control
These options allow you to avoid losing the existing workbooks in the destination site that might be replaced by the migrated workbooks.
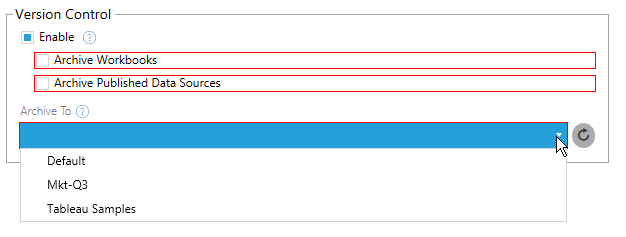
Select Enable to save previous versions of your content. You can choose to archive workbooks and/or published data sources. Once version control is enabled, you must select a project from the Archive To menu, which lists all the projects in your
Step 3: Save plan
Once you have selected your plan options, click Save Plan to save your plan for future use. The plan will be saved to the Documents\Tableau Content Migration Tool Plans folder on your local machine.
Step 4: Continue to next step
When you are ready, click Verify & Run to end the Planning phase and prepare to run your plan.
Who can do this
Tableau site user with an Explorer role or higher. To migrate content, you must have View and Download/Save a Copy capabilities for workbooks on the source site and View and Publish capabilities for target projects on the destination site. For more information, see Permissions.