Create Hierarchies
When you connect to a data source, Tableau automatically separates date fields into hierarchies so you can easily break down the viz. You can also create your own custom hierarchies. For example, if you have a set of fields named Region, State, and County, you can create a hierarchy from these fields so that you can quickly drill down between levels in the viz.
Create a hierarchy
To create a hierarchy:
-
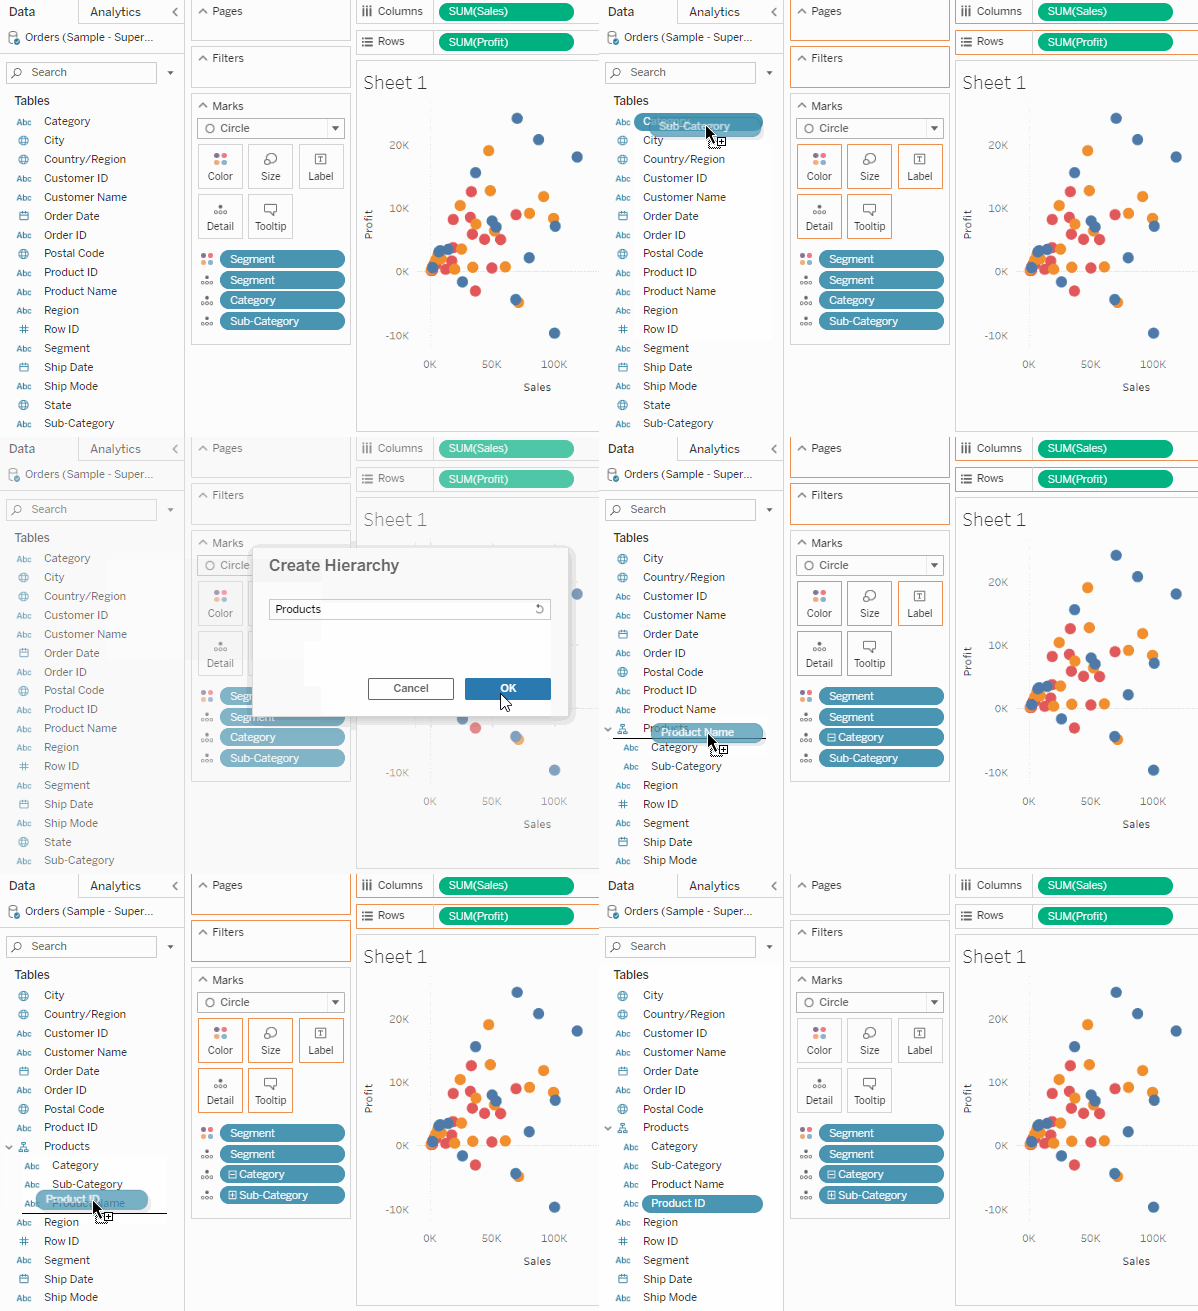
In the Data pane, drag a field and drop it directly on top of another field.
Note: When you want to create a hierarchy from a field inside a folder, right-click (control-click on a Mac) the field and then select Create Hierarchy.
-
When prompted, enter a name for the hierarchy and click OK.
-
Drag additional fields into the hierarchy as needed. You can also re-order fields in the hierarchy by dragging them to a new position.

Drill up or down in a hierarchy
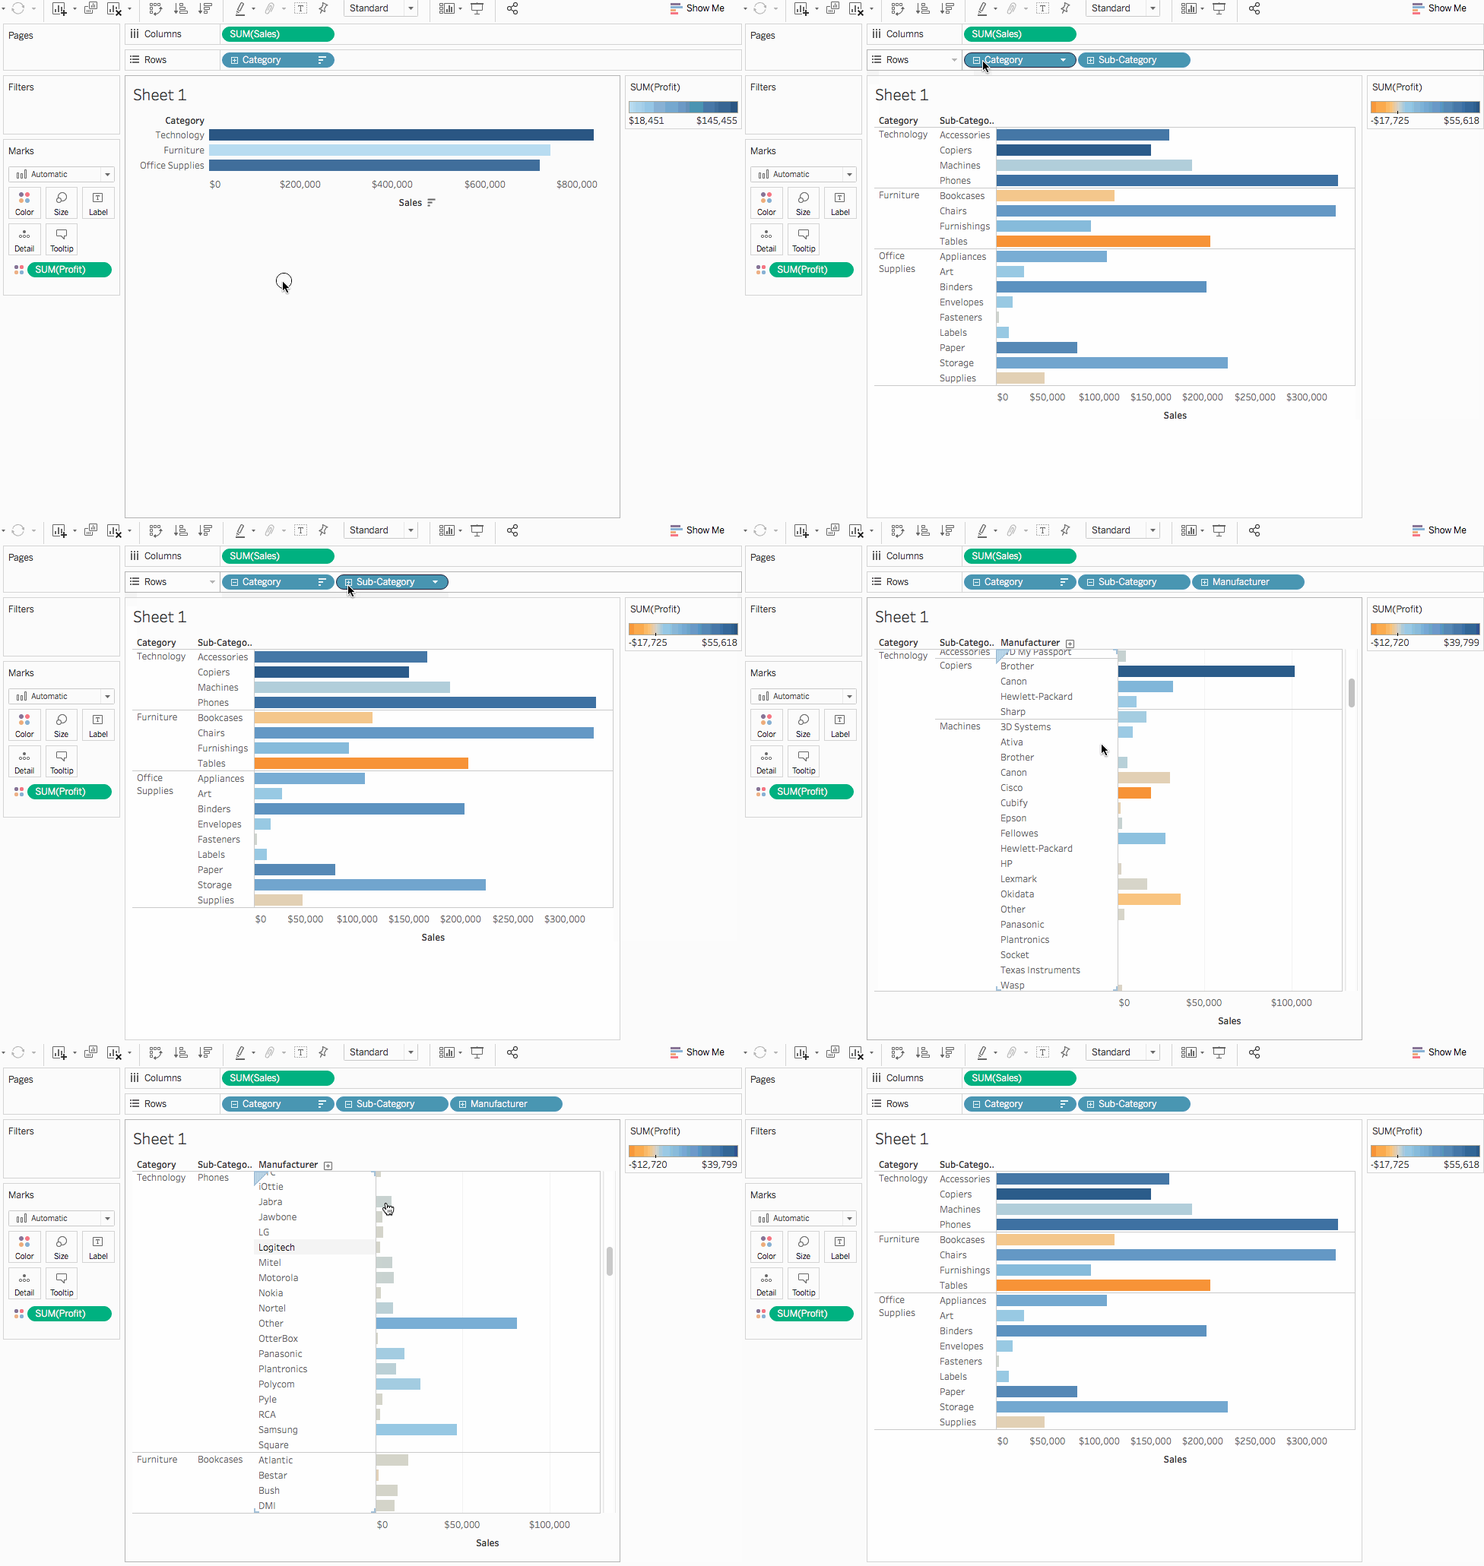
When you add a field from a hierarchy to the visualization, you can quickly drill up or down in the hierarchy to add or subtract more levels of detail.
To drill up or down in a hierarchy in Tableau Desktop or in web authoring:
-
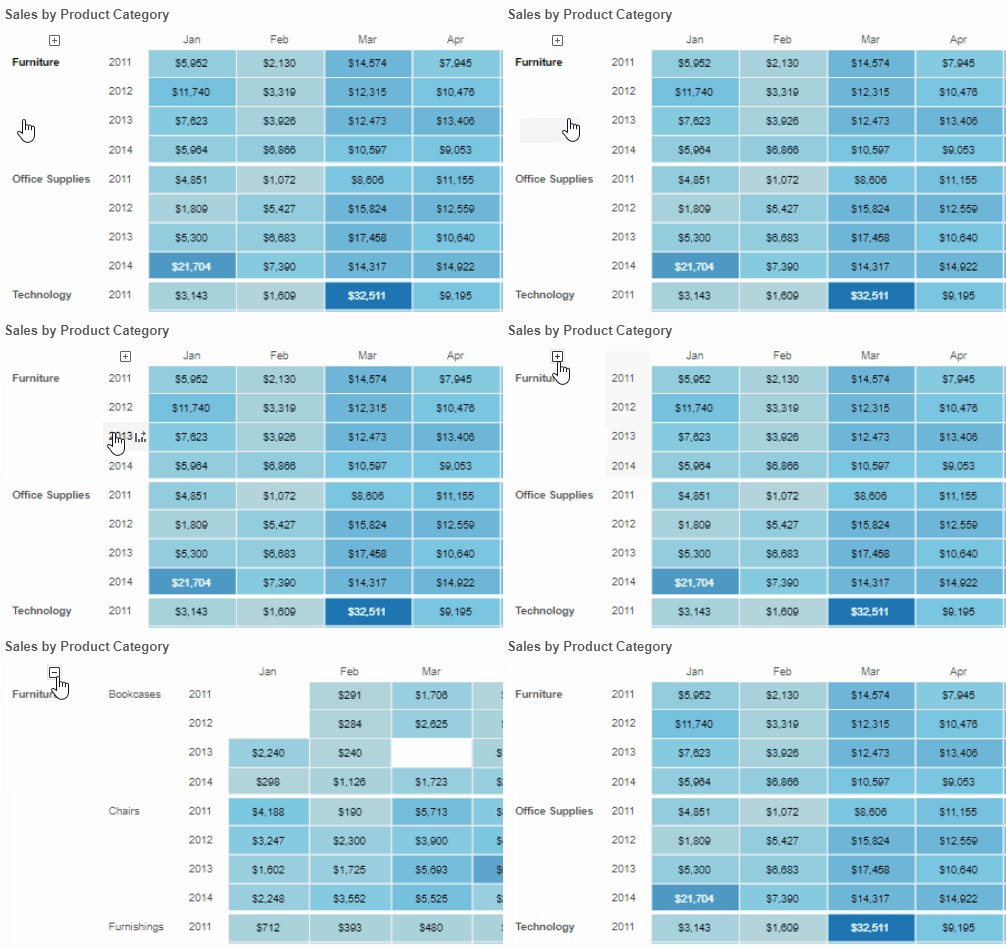
In the visualization, click the + or - icon on the hierarchy field.

When you are editing or viewing the visualization on the web, you have the option of clicking the + or - icon next to a field label.

Remove a hierarchy
To remove a hierarchy:
-
In the Data pane, right-click (control-click on a Mac) the hierarchy and select Remove Hierarchy.
The fields in the hierarchy are removed from the hierarchy and the hierarchy disappears from the Data pane.
-
