Organise Items in a Collection
Collections let you gather related items into an easy-to-access list. With a collection, you can organise items in a way that is meaningful to you, without worrying about who owns an item or which project it lives in on your Tableau site.
You can keep a collection private or share it with others. When you give others access to a collection, there’s no risk of exposing data because collections don’t affect the permissions for the items they contain. In a collection, users see only the items that they have permission to access.
You might want to build a collection to:
- Onboard new employees with data that is appropriate for their roles
- Organise the data that you frequently use for a project in one place
- Promote certified data and approved dashboards in your organisation
Find collections
From the navigation pane, click Collections to see all the collections you have permission to view. The collections that you are the owner of appear under the My Collections tab. Collections aren’t included in the Explore section of your site or when you search, but they do appear in Favourites and Shared with Me, if applicable.
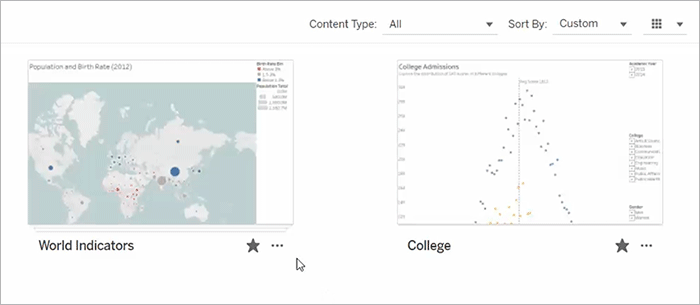
When you open a collection, you’ll see the items you have permission to view. If there are many items in the collection, filter and sort to find specific items (some filter and sort options are limited in collections). The number of items displayed in a collection may differ from the total number of items listed in the collection details, depending on the permissions for the individual items.
Create a collection
To add items to a collection, you first need to create one. Anyone can create a collection. You don’t need a specific role or permission.
From the navigation pane, click Collections.
Click the New Collection button.
The collection is created with a default name.
To change the name from the default, mouse over the name and click on the highlighted text. Enter a new name, and then click Save.
To add a description, mouse over the description area and click on the highlighted text. Enter a description, and then click Save.

You can also create a collection from the Add to Collections dialog, shown below.
Add items to a collection
If you can view an item on your site, you can add it to your collection, with the exception of external assets (databases, files and tables), lenses and other collections. You must own a collection to be able to add items to it. Although the items you collect might belong to different projects, you can add them to a collection without needing to move or copy them.
Navigate to the item that you want to add to a collection.
Click on the Actions (...) menu, and then click Add to Collections.

To add multiple items to a collection, select tick boxes for the items, and then click Actions > Add to Collections.

On the Add to Collections dialog, select the collection you want to add the item or items to. You can select multiple collections. If a collection name isn’t selectable, that means that the collection doesn’t have enough space to accommodate the items. A collection can contain a maximum of 1000 items.
(Optional) If you want to make a new collection for these items, create one by clicking the New Collection button. Once you create it, the new collection will be pre-selected in the dialog.

Click Add.
Remove items from a collection
You can remove items from collections that you own.
From the navigation pane, click Collections.
Click on the My Collections tab.
Open the collection you want to remove items from.
To remove a single item, click the Actions (...) menu for that item, and then click Remove from This Collection.

To remove multiple items, select tick boxes for the items, and then click Actions > Remove from This Collection.

If you accidentally remove an item, don’t worry. You can simply navigate back to where it lives and re-add it.
Deleting a collection or removing items from a collection won’t delete the actual items because the link between the collection and the items it contains is like a shortcut. This is different to deleting a project or an item in a project, where you are managing the actual items. The Delete action is disabled from within a collection, so there is no risk of accidentally deleting an item while managing items in a collection.
Organise your collection
You can reorder items in collections that you own. In grid view, drag and drop an item to move it.
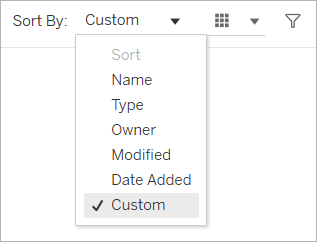
Switch between the custom sorting order you create and other orders like date or name using the Sort By menu. The custom order that you create will appear as the default sort order for others who can view your collection as well.
Manage collection permissions
Collections are private by default. You can give other users access to a collection either by configuring the permissions for the collection directly or by granting access after sharing the collection.
Be aware that permissions for a collection do not affect the items in the collection. This means that some users might see fewer items in your collection than you do because they don’t have permission to access all of the items. Contact the content owner or your site administrator for help with permissions for restricted items.
Configure permissions
If you are the owner of a collection, you can configure permissions for the collection. There is only one capability available for collections: View. Giving users the View capability will allow them to see the collection, but they won’t be able to add or remove items from the collection. The View capability for a collection doesn’t give users access to items in the collection that they don’t have permission to. For more information about how permissions work in Tableau, see Permissions.
- Click on the Actions menu (...) for the collection, then click Permissions.
- Under Permission Rules, click Add Group/User Rule.
- Enter a user or group name.
- Under Template, click View.
- Click Save.
The collection will now appear on the Collections page for the users you added. These users won’t be notified about the change in permissions, so if you want to make them aware of the collection, share it with them.
Grant access by sharing
The option to grant access appears after you share a collection if you are the collection owner.
- Click on the Share (
 ) button for the collection.
 - Enter the name of the user or users you want to share with.
- Click Share.
- On the Grant Access dialog that appears, click Grant Access.
If the people you shared with already have access to the collection, either because you previously configured permissions or because their site role gives them access, you won’t see the grant access dialog.