Configure SCIM with OneLogin
You can configure user management through OneLogin and provision groups, and assign Tableau Cloud site roles. If you’re not yet familiar with Tableau site roles and the capabilities each allows, see Set Users’ Site Roles.
As you complete the following steps, it might help also to have the OneLogin documentation at hand. Start with Introduction to User Provisioning(Link opens in a new window) in the OneLogin documentation.
Notes:
These steps reflect a third-party application and are subject to change without our knowledge. If the steps described here do not match the screens you see in your IdP account, you can use the general SCIM topic along with the IdP’s documentation.
- The configuration steps in the IdP may be in a different order from the one you see in Tableau.
Step 1: Perform prerequisites
The SCIM functionality requires that you configure your site to support SAML, OIDC or Google single sign-on (SSO).
If using SAML authentication, complete the following sections in Configure SAML with OneLogin(Link opens in a new window):
If using OIDC authentication, complete Configure Tableau Cloud or TCM for OpenID Connect.
After you finish the steps in these two sections, remain signed in to both the OneLogin portal and Tableau Cloud, with the following pages displayed:
In Tableau Cloud, the Settings > Authentication page.
In the OneLogin portal, the Configuration page.
Step 2: Enable SCIM support
Use the following steps to enable SCIM support with OneLogin. See also the Notes and limitations for SCIM support with OneLogin section below.
Note: Remember to click Save in the upper right corner of the OneLogin portal after making configuration changes.
In Tableau Cloud
Sign in to your Tableau Cloud site as a site administrator, and select Settings > Authentication.
Do the following:
On the Authentication page, under System for Cross-domain Identity Management (SCIM), click the New Configuration button.
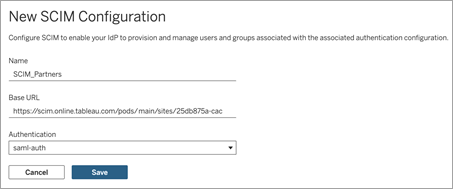
In the New SCIM Configuration dialog box, do the following:
Enter a name for the SCIM configuration.
Copy the Base URL to use in your IdP's SCIM settings.
From the Authentication drop-down, select the authentication configuration to associate with SCIM.
Click Save.
Note: This populates the SCIM token section.
Under SCIM token, do the following:
- Click the New Secret button.
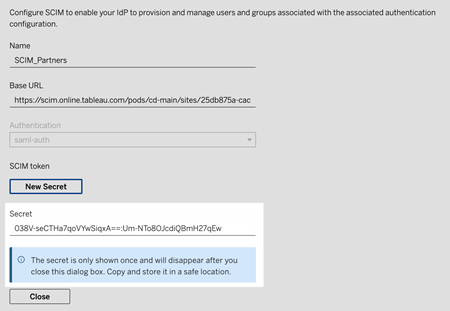
In the New Secret dialog box, click the New Secret button again. A newly generated secret will be displayed.
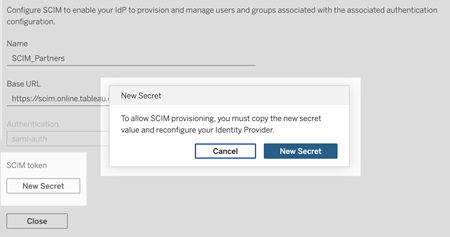
Copy the secret and store it in a safe location.
Important:
If you close the SCIM configuration before you can add the secret to your IdP's SCIM settings, you can edit SCIM configuration but will be required to click New Secret again to generate a new secret.
The secret is tied to the Tableau site administrator user who created the SCIM configuration. If that user’s site role changes or the user is no longer a member of the site, the secret becomes invalid. In this case, another site administrator can generate a new secret for the existing SCIM configuration and add it to the IdP's SCIM settings or create a new SCIM configuration ensuring the base URL and secret is added to the IdP's SCIM settings.
Click Close.
In OneLogin
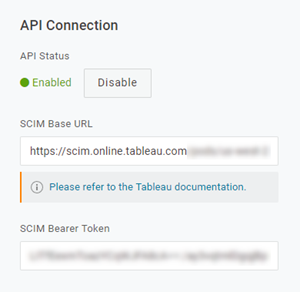
In the OneLogin portal, on the Configuration page, do the following:
For API Status, click Enable.
For SCIM Bearer Token, paste the Tableau Cloud SCIM secret token you copied earlier.
For SCIM Base URL, copy and paste the Base URL shown in the Tableau Cloud SCIM settings.
On the Provisioning page, do the following:
Select Enable provisioning.
Select Suspend for When users are deleted in OneLogin, or the user's app access is removed, and perform the below action.
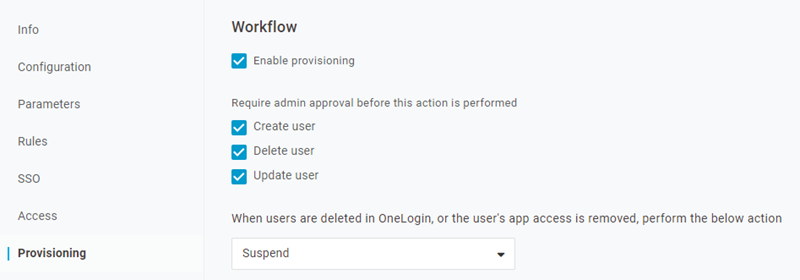
Click Save.
(Optional) On the Parameters page, map SCIM Username to the Email attribute. If you don’t map SCIM Username to an attribute in email address format, you’ll have to manually populate this field for each user as part of the provisioning process.
An error is displayed when provisioning users if the mapped value doesn’t contain the user email address.
If you want to complete the steps for provisioning users and groups, stay signed in to the OneLogin portal and proceed to the next section.
Step 3: Provision users and groups
OneLogin gives you a number of ways by which you can assign user attributes such as groups or site roles. You can apply them at the Tableau Cloud app level, create mapping rules or apply them manually to individual users.
Before you begin, it's important to note the OneLogin concept of groups operates differently from that of the Tableau concept of groups. In OneLogin, groups function as security boundaries to apply specific security policies to users. Because of this, users can only belong to one group at a time.
Additionally, OneLogin uses roles as a container for applications that different user cohorts can access. Once you assign users a role, you grant them access to all the applications included in the role. This is similar to the Tableau concept of groups. Users can have multiple roles in OneLogin, which can be mapped to a target application group, such as Tableau Cloud.
Note: The following steps assume that you are signed in to the OneLogin portal and Tableau Cloud app. These steps provide some Tableau-specific information that you can use with the OneLogin documentation for mapping group and site role attributes to users.
Provision a user
Use the following steps to provision individual users to Tableau Cloud through the OneLogin portal.
Go to the Users tab and select the user you want to provision. This opens the user settings page.
From the left navigation menu, select Applications.
On the Applications page, click the plus (+) icon to provision the user for your Tableau Cloud application, and then click Continue.
Enter the appropriate Tableau Cloud site role for the user in the Site Role field. For more information about site roles, see Set Users’ Site Roles(Link opens in a new window).
Click Save.
Provision multiple users with OneLogin roles
You can provision multiple users to Tableau Cloud by assigning roles in OneLogin. Users can be added to roles manually or automatically using mappings.
To add users to a role:
Go to Users > Roles, and select an existing role or create a New Role. For more information, see the OneLogin article Roles(Link opens in a new window).
The following example shows the role “Sales” that we’ll use as a group in Tableau Cloud later on.
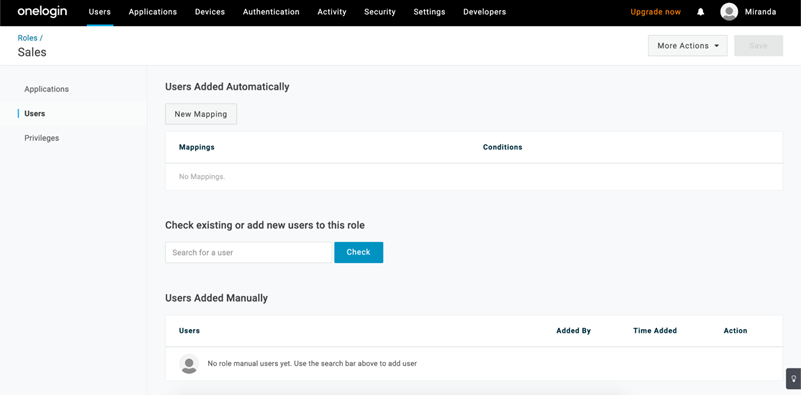
On the Applications page, assign the role access to the Tableau Cloud application. This should provision the associated users to the application automatically.
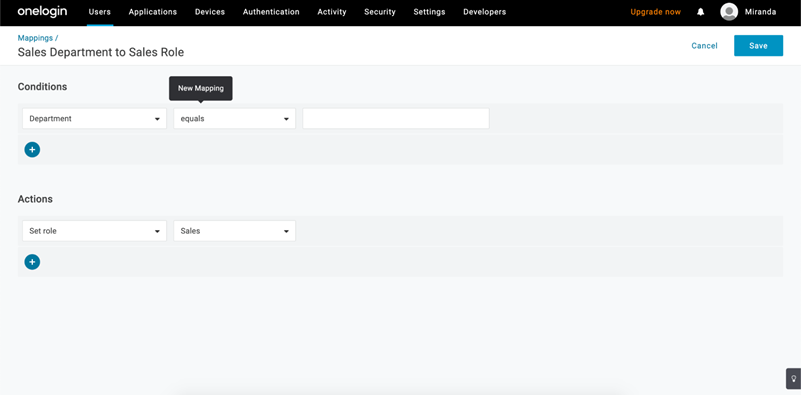
On the Users page, you can add users to a role manually by entering their first and last name, or add a mapping to automatically add users to a role based on specific attributes – such as their Active Directory group, for example.
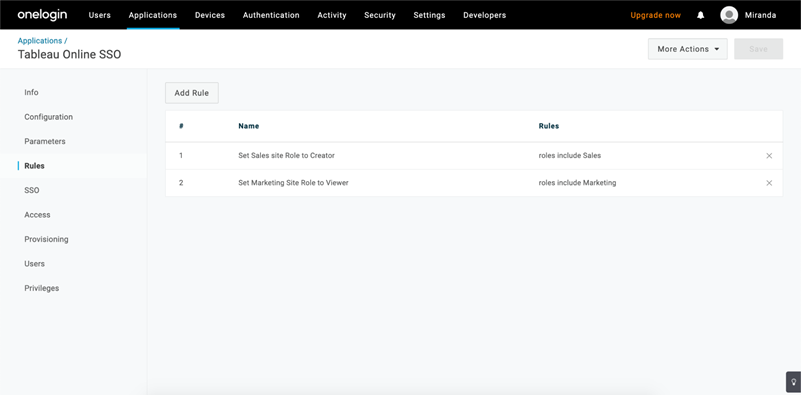
After adding users to roles, we recommend you create rules within the application to assign the appropriate Tableau Cloud site role based on the OneLogin role. For more information, see the OneLogin article Configure Apps(Link opens in a new window).
In the image below, users with the ‘Sales’ role will be assigned the Creator site role in Tableau Cloud. Likewise, users with the “Marketing” role will be assigned the Viewer site role.
Add users to existing Tableau Cloud groups
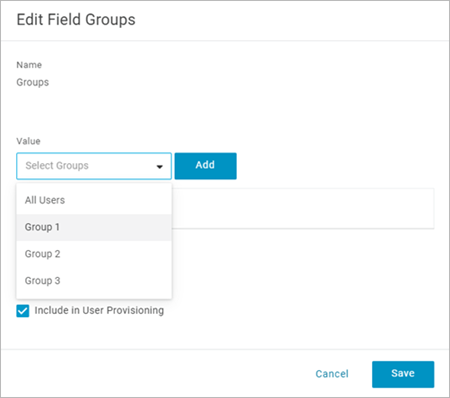
Import Tableau Cloud groups into OneLogin and specify the groups you want to be selected by default in the user provisioning dialog.
On the Parameters page, click Groups, and select the Include in User Provisioning check box.
Go to the Provisioning page, and in the Entitlements section, click Refresh.
This imports the groups from Tableau Cloud.
Go back to the Parameters page, and then select the groups that you want to show as selected values in the user provisioning dialog.
To change group membership, go to the Users page, select a user, and in the Groups section, modify the available and selected values.
You can also create mappings that put users into groups automatically, based on conditions you define. For more information, see the OneLogin article Mappings(Link opens in a new window).
Create groups in Tableau Cloud from OneLogin
Use the following steps to create Tableau Cloud groups based on attributes in OneLogin mappings. For example, creating a group in Tableau Cloud based on user roles.
Go to Applications, select the Tableau Cloud application and then Rules.
On the Rules page, click Add Rule to open the edit mapping window.
Under Actions, select Set Groups from the drop-down menu, and then select Map from OneLogin.
The conditions field with value that matches uses regular expressions. If you want to create a group in Tableau Cloud that matches the role name in OneLogin, type
.*in the text field.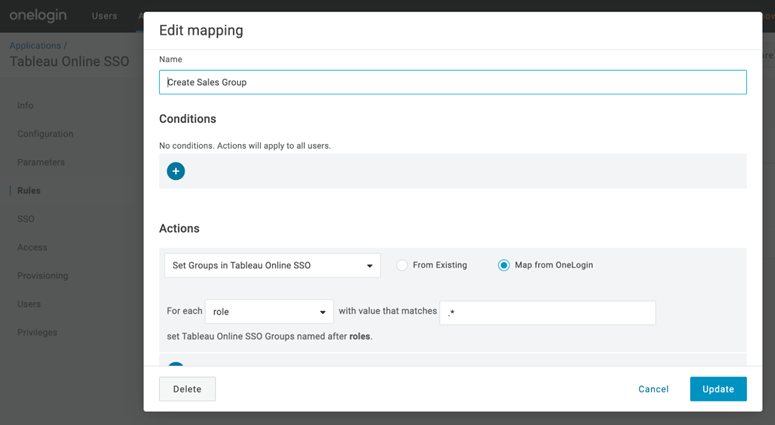
Assign Tableau site roles
By default, users are assigned the Viewer site role, which occupies a Viewer licence type.
Whatever method you use in OneLogin to assign site roles, at some point you need to enter the site role name into a text box. For the allowed values you can type, see Valid Tableau site role values below.
Here are some of the ways you can assign site roles
For individual users:
On the Users page, select the user and then navigate to the Applications tab. Select the corresponding Tableau Cloud application.
In the user settings, type the site role name in the Site Role text box.
For a set of users:
On the Parameters page, click Site Role, and then, for Value, select one of the options for assigning the site role attribute
For example:
If all users have the same site role, select Macro and enter the site role name.
If the OneLogin user directory contains the site role, select the corresponding attribute.
- On the Rules page, create a rule that maps a role to a particular role in Tableau Cloud.
When you’re done assigning the site role, click Save.
Valid Tableau site role values
On the Provisioning page in your OneLogin portal, the Site Role values you can enter are based on current or legacy licence roles.
Current licence roles include the following site role values:
Creator, Explorer, ExplorerCanPublish, ReadOnly, ServerAdministrator, SiteAdministratorExplorer, SiteAdministratorCreator, Unlicensed or Viewer.
Legacy (pre-v2018.1) licence types come with the following site roles:
Interactor, Publisher, ServerAdministrator, SiteAdministrator, Unlicensed, UnlicensedWithPublish, Viewer or ViewerWithPublish
To learn the effects of changing user attributes, or how to reset individual user attributes you changed manually, see the OneLogin article Provisioning Attributes: the Effect of Defaults, Rules and Manual Entry(Link opens in a new window).
Notes and limitations for SCIM support with OneLogin
You must add a separate Tableau Cloud app for each site you want to manage using SCIM.
When deprovisioning or removing an existing user from the Tableau Cloud application in OneLogin, the user is converted to an Unlicensed site role in Tableau Cloud in case they own any content assets. If the user does own content, you must first reassign ownership of those content assets before you can manually delete the user in Tableau Cloud.
Use of SCIM with Grant Licence on Sign-in is unsupported and may result in incorrectly provisioned site roles for users or groups.